From within the system the progress of unposted inventory assemblies can be tracked by changing the workflow status. This can also be done using the Mobile Assemblies feature in the Acctivate Mobile Inventory Management add-on module, but the following will detail the steps from the desktop.
A keyboard wedge or USB barcode scanner can be used to quickly change the status of unposted assemblies.
Defining workflow statuses:
Acctivate already includes system-defined workflow statuses, but users can define additional statuses to track unposted assemblies.
- Select File > Configuration Management.
- Select the Inventory folder > Assembly Work Order Workflow Status configuration option.
- Any workflow statuses specific to your business can be added to the Assembly Work Order Workflow Status configuration data grid. Click Edit.
- A blank line with an asterisk to its left side will appear in the data grid. In each provided field of the line enter the necessary information for a new workflow status.
Note: Status is the only data that cannot be user-defined for a workflow status. From the Status drop-down menu, you must select from a list of system-defined statuses. - Click Save after all the necessary workflow statuses have been entered.
- To delete a workflow status from configuration, in edit mode click the specific line to select it (an arrowhead to the left of the line indicates it is selected) and press Delete on the keyboard.
Click Save to save the changes.

Changing workflow statuses:
The workflow status for assemblies can be changed from the Change Assembly Work Order Workflow Status window for any unposted assembly transactions. These are transactions that have been entered in the Inventory Assemblies window, but not posted.
- Select Inventory > Change Assembly Work Order Workflow Status.
- From the ‘Set Workflow Status to‘ drop-down menu select a workflow status (which are the workflow descriptions defined in configuration).
- The Work Order field requires the work order number in session-transaction format when entering the unposted assembly transaction to update.
Note: If the number entered here does not contain a hyphen it is assumed that the transaction is 1. To search for a specific transaction, rather than manually entering it, click the Lookup button. From the Find Inventory Transaction window that appears select the appropriate transaction. The transaction can also be entered by using a keyboard wedge or USB barcode scanner to scan the barcode (encoded with the work order number) on a printed Standard Assembly Work Order. - The other fields will populate according to what was previously entered for the specific transaction in the Inventory Assemblies window.
- Click Change to update the workflow status for the selected transaction and leave the window open to continue changing workflow statuses for other unposted transactions.If using a keyboard wedge or USB barcode scanner, the device can be programmed to automatically ‘enter’ after each scan to move to the next assembly, otherwise manually press the ‘Enter’ key.
- Click Close to close the window.
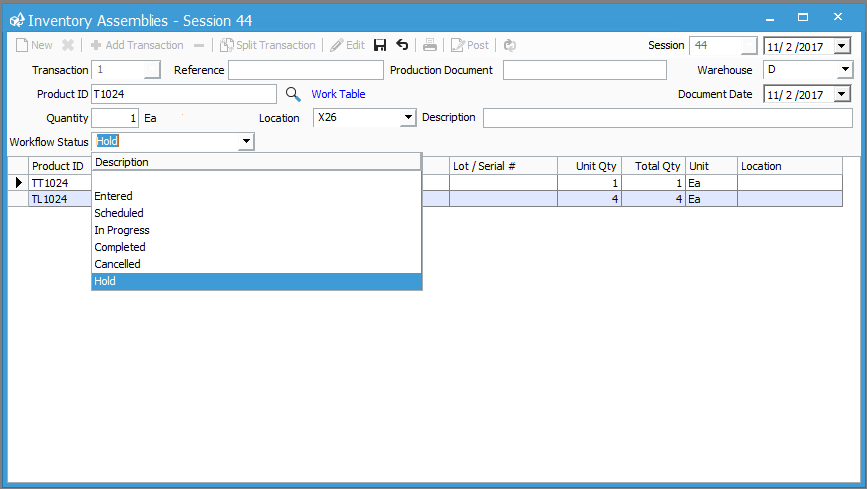
- The updated workflow status for the transaction will display for the specific transaction in the Inventory > Inventory Assemblies window. In this window, the workflow status can also be updated from the provided Workflow Status drop-down menu.
There are different statuses that can be chosen on the Status drop down column. These values are static and cannot be changed or updated at this time. The status should correlate to what the Description should be similar to. For example, “Hold” might be related to scheduled. Once that’s been added, you can change the sequence in which this option might appear in the menu. In this example, sequence 6 would appear last on the list. Once that’s entered click SAVE.
More information about this can be found on our docs page.