Assigning default forms and email templates
This article explains how the administrator can assign default reports, message templates, and whether or not you prefer to preview or email the reports.
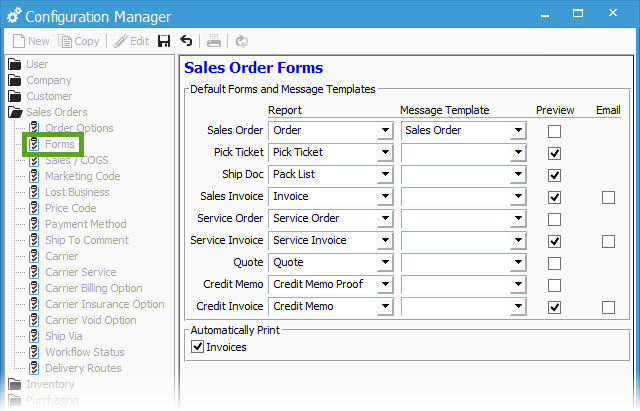
In Configuration Management, the administrator can assign default reports, message templates, and whether or not you prefer to preview or email the reports. To get to this section, go to File > Configuration Management > Sales Orders > Forms.

For the reports, you'll see the corresponding reports based on where the report prints on the window. The Sales Order reports will show in the Sales Order section, the Sales Order Picking reports will show in the Pick Ticket section, etc. This sets the default form to print when clicking the corresponding icons rather than using the drop down to select it manually each time. If you wish to go directly to printing on certain forms, uncheck the Preview box for each one. If you would like to email the forms, check the corresponding Email box.
The same goes for the Message Templates. The administrator can set the default Message Template to populate an email sent from each window depending on the form being sent. This way your users don't have to Insert the template each time. However, they can Replace the template with another that makes more sense depending on the need.