Batch print/emailing a Customer's Previous Invoices.
Occasionally, you may need to send a customer copies of their completed invoices. Follow the steps below to set up the ability to print batches of existing invoices by customer.
If you're looking to create invoices in batches see our training site.
- Go to File > Manage Reports
-
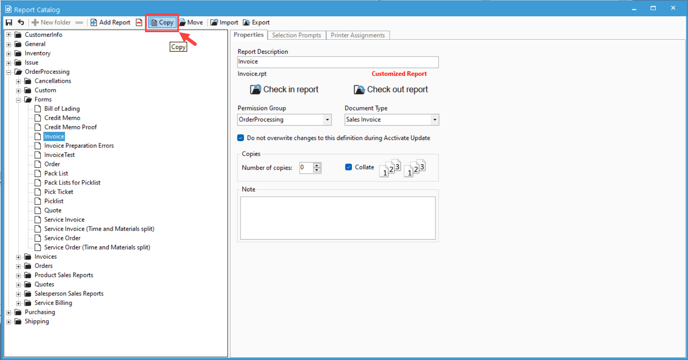
Click the Edit Pencil at the top of the window to enter Edit Mode.
- In the Report Catalog, expand Order Processing > Forms.
- Highlight the Invoice report, then click Copy at the top of the report catalog.

- The next window will prompt you to select the destination for the report. Select the ‘Invoices’ folder directly below the original ‘Forms’ folder.
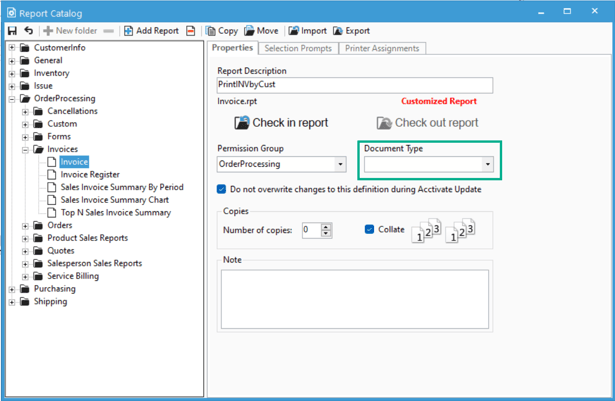
- After hitting select, the copied report information will show on the righthand side of the window and you can begin configuring the report to print outside of the invoice window in this secondary format.
- Update the Report ID to a new short name, for example "PrintInvbyCust"
- The Document Type will be set to "Sales Invoice," click the dropdown, scroll to the top and select the blank option.

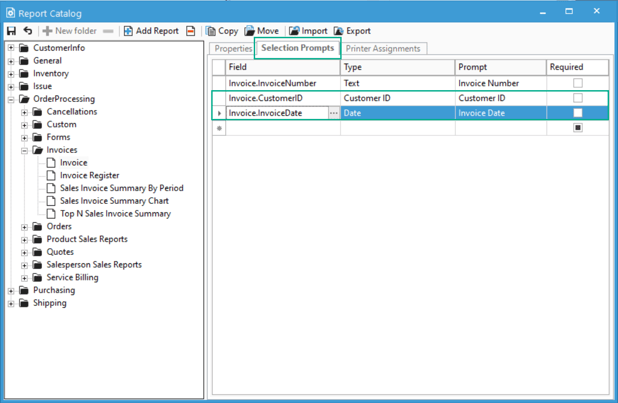
- Go to the Selection Prompts tab at the top of the screen
- Highlight the row where the field is Invoice.ReadyToPrint and hit the delete key on your keyboard to remove it.
- click on the blank row under field and then click the '...' that appear. In the window that opens, expand Invoice, then scroll down until you see CustomerID and add that field.
- Repeat the last step, this time adding InvoiceDate. Your Selection Prompts should look like this:

- You may add additional invoice filters such as Balance or AmountPaid, if you like.
- Save the changes & the report will now be available under Sales Order Reports > Invoices. Use the filters as normal to select to print invoices for the specific customer and date range. Use the email option in the report preview if needing to email to your customer.