Occasionally, you will want to bring in Charges from your web store, like shipping, or tax, as a line item. Or, you may want to bring in a Discount line, also a C line type in Acctivate. In these cases, you can create the line item in Acctivate and add the Order Charges or Order Discount section to your web store template. The setup process for both Discounts and Charges is almost identical.
Steps to map Order Charges or Order Discounts
- Create the charge product in Acctivate. Follow this Sales Tax line item guide or this Miscellaneous charges line item article for directions how a charge item can be set up.
- Open the Sales Order Sorce Value window in the Web Store template in Acctivate. You may need to set "Show advanced configuration options" to Yes on the Configure web store window.
- Change the Subdocument to Order.
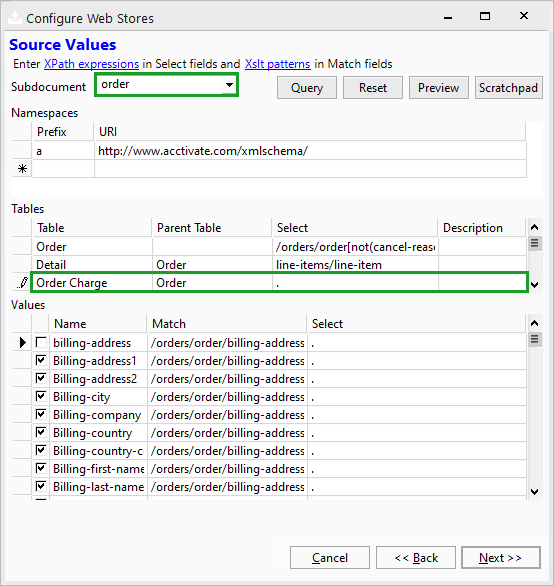
- Change the Order Charge sub-table to have a "." in the Select field. If there is already a "." in the Select statement, skip this step. If there is something other than a "." in the Select statement, contact whoever is responsible for maintaining the web store template. This might be Support or someone else you've tasked with this.
NOTE: to add a Discount, make the same changes to the Order Discount sub-table.
- Change the Subdocument to Order.
- Click next to go to the Mapping window.
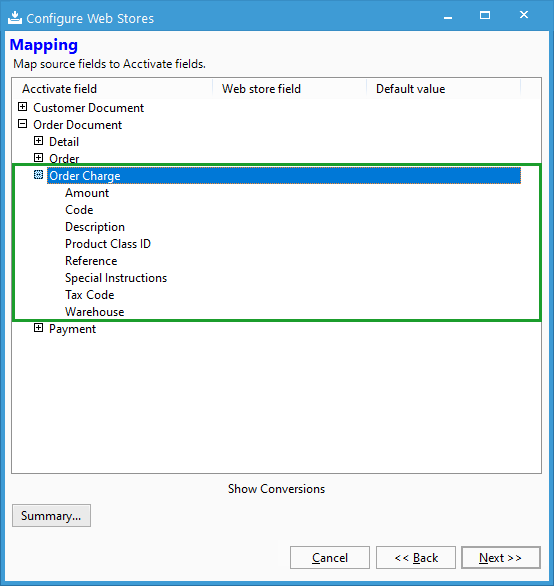
- Expand Order Document.
- Expand either the Order Charge or Order Discount section.
- Map the following fields to your XML from the web store:
Amount: the Amount the Discount or Charge should be in Acctivate. This is the line total. Ex: 15.00
Code: This is the Product ID in Acctivate and the ID, Code, or Description from the web store, depending on how it comes over. This is the Discount or Charge listing on the web store. Ex: OOS or Tax
Description: Optional to map. This is the description of the code. This will go to the Description field on the Order. Ex: Out of State sales tax
* You can map the other fields to bring in the other information. Amount and Code are required to bring in the item line and the price amount. All other fields are optional.
- Exit the mapping and Save your import changes.
Note:
If you are bringing in Sales Tax as a line item, you will probably need to set up a Conversion for the Product ID (Code) to match between the web store and Acctivate. Instead of mapping the Code for the Sales Tax, you can set the Default Value to be the same as the Sales Tax Product ID you create in Acctivate and just bring in the Amount from the web store. Do this if the line item in Acctivate will always select the same Product ID. The same can be applied to any other Charge or Discount. If you are using a line item tax, be sure you remove any Web Store Field or Default Value from the Tax Category ID, or set it to be None 0%, and set the Tax Code to be None for the Default in the Order section of the Mapping.
Other related line item charges