A branch is generally a division or department of your company where products can be ordered and it often stores and ships it's own product. Unlike a warehouse, where the primary function is to segment the physical inventory, a branch's main function is to segment sales.
A branch often has it's own physical address and phone number that customers can call to place orders and in these cases the branch will is also likely to have it's own distinct warehouse where the products it sells are stored. You may also have a branch that operates out of the same warehouse and is only for segmenting sales, for example separating Ecommerce sales.
To create a new branch:- Select File > Configuration Management to open the Configuration Manager.
- Select Customer folder > Branch.
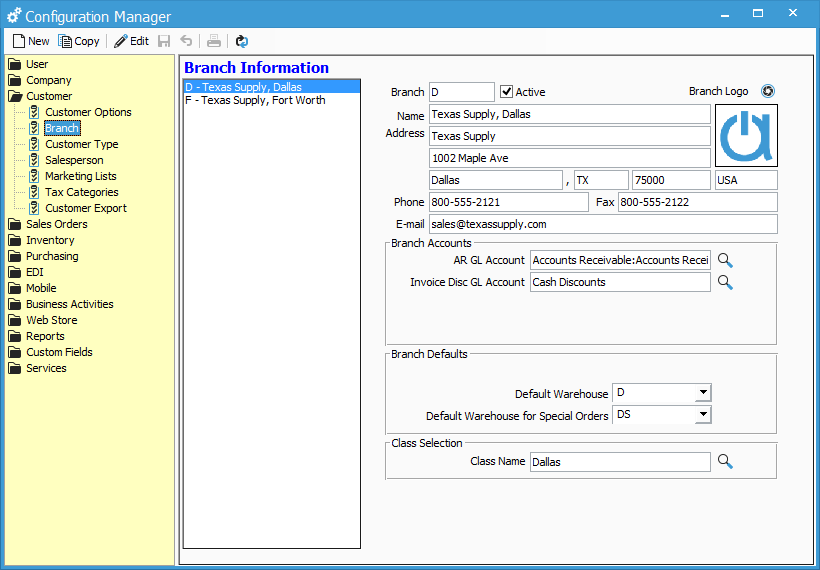
- In the Branch Information window, click the New button.
- Enter a unique Branch ID in the Branch field.
- Check the Active checkbox, if your ready to use the branch on current transactions.
- Optionally, fill out address and phone information.
- QuickBooks Desktop only: Choose the accounts receivable account you'd like sales for this Branch to be recorded in.
- If you use whole order discounts, choose the GL account you'd like discounts for this Branch to use.
- If the Branch has it's own warehouse, add that information to the Branch Defaults section.
- If you use QuickBooks Class Tracking you can associate your Branch with your QuickBooks class.
- Once you've filled in all of your desired fields, click the Save button.