How to Create and Build a Standard Assembly Product.
This article explains how to create and build a standard assembly product.
The Assembly feature in Acctivate allows you to purchase multiple inventory items and combine them together into one assembled or finished good product for stock.
Acctivate will keep track of all inventory and material costs for this new product. Building the assembly item rolls up the cost of the components into the finished good. The finished good is then used on a sales order.
An explanation of the differences between Assemblies and Kits can be found here. The example below goes over creating a Table Assembly (Standard) item. Take a look at the following articles for information on Assembly (Custom) or Assembly (Process).
Creating an Assembly Product
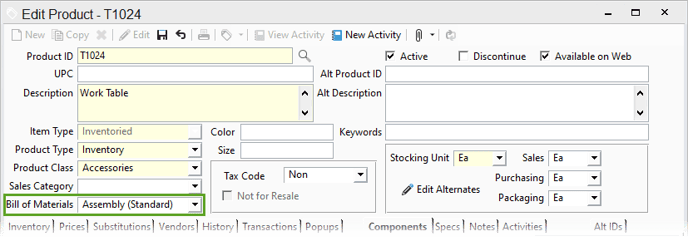
- Select Inventory > Edit Product from the Acctivate desktop or click the Product icon to open the Product Information window.
- Click the New button.
- In the Product ID field enter a product ID for the new product.
- In the Description field enter a description for the product.
- Fill in all the remaining required fields which are highlighted in Edit mode for new items.
- Set the Bill of Materials field to Assembly (Standard).

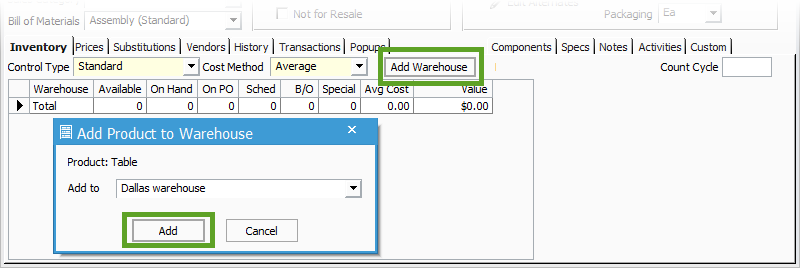
7. To add a warehouse, click the Add Warehouse button in the Inventory tab.
8. Select the appropriate warehouse from the drop-down menu in the Add Product to Warehouse window followed by Add.

9. Repeat this step for each warehouse, if you will have multiple warehouses.
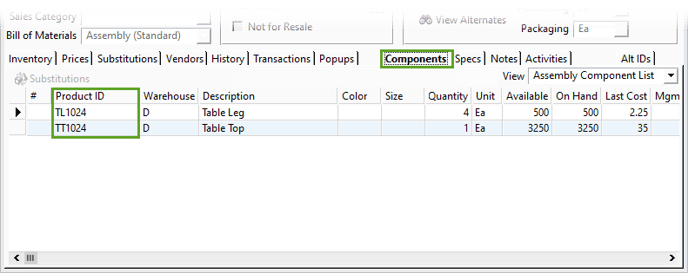
10.In the Components tab of this new product, the various pieces need to be entered line-by-line with a quantity set for each item. These items must exist in the Acctivate database to be added as a component.

11. When all the components have been added to the assembly product, click the Save button. We now have a new Table Assembly (Standard) item.
Building Assembly into Inventory
The steps below are for an Assembly (Standard) Bill of Material item. If you are utilizing Assembly (Custom) or Assembly (Process), check out the manufacturing with custom assemblies and process manufacturing articles for details.
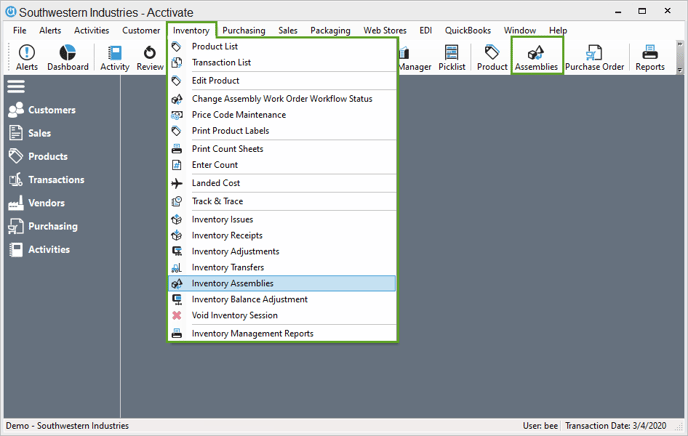
- Open the Inventory Assemblies window by clicking Inventory > Inventory Assemblies. Feel free to add the Assembly icon to your Icon Bar, as well.

2.Click the New button to create a new session. A new transaction will automatically be created in the session.
3.Select the Warehouse to be where the final assembled product will be stocked.
4.Select the Product ID that you will make into an assembled product.

5.Enter the Quantity being built.
6.Verify the W/H selection for each component line. This information defaults based on the Components tab on the Product window.

7. If using Lot/Serial numbers or Bin Locations, make sure to select the proper information for each component, as well as the finished good.
8.When you are ready, click Save.
9. Click Post to remove the components from inventory and add the finished good to your warehouse. Keep in mind, you must have adequate quantity on hand for each component to post the session.
10.You will be asked if you're sure you want to post, click Yes.
11. Preview, Print, or Cancel Inventory Assembly Register print based on your needs. This report can be run at any time based on date or session number from the Inventory Reports menu.