Email message templates can be created within windows that have email functionality. These templates are stored within the system for all email-capable windows; and for access by all users or only the user who created it.
Creating and Managing Email Template
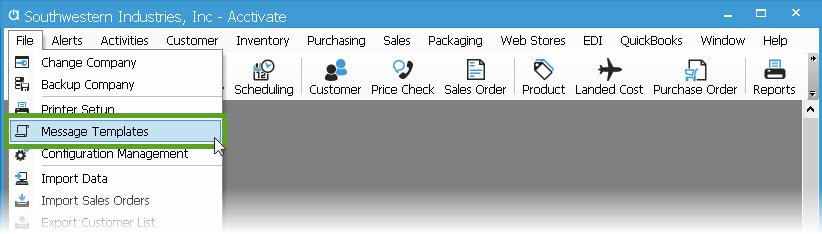
- Go to File > Message Templates
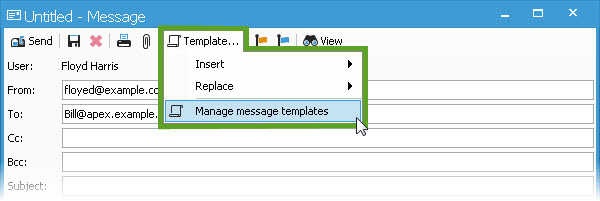
- You can also get here by opening any of the Send Email windows > Template... > Manage message templates.
- Click the New message template button ( Ctrl + N) or choose an existing template to modify.
- Change the text from "New Message" to be the Template name you wish to see in the drop down in the Template field.
- From the Type drop-down menu, at the bottom of the page, select the email-capable window where this template will be utilized. At the bottom of this page, you will find a list of template Options to choose from and which windows the template will be available in.
- Enter Subject and Body text.
- Note: When composing the subject and body of the email template you can include data fields. These will automatically pull the matching data from the selected record into the email when the template is selected. Ex: Document #, Contact Name, etc. Refer to: Message Template Fields for data fields that can be used when the message template is set to specific types.
- Check the box labeled Available for all users to enable other users to utilize this template.
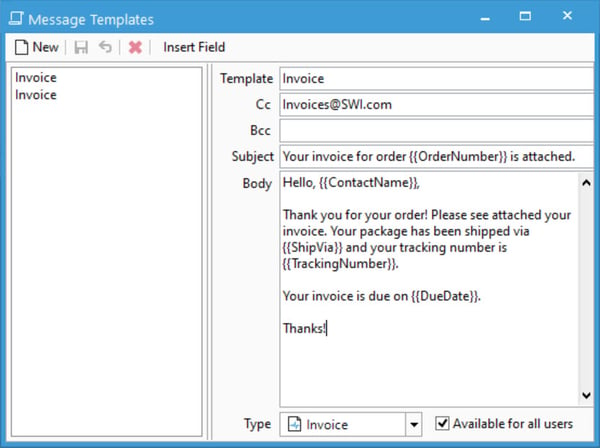
- Save the template
Using an Email Template
Now any created templates are available to use for email sent from within the window specified
- Click the Send Email button to open the Email Message window.
- Click the Template... button. The user has 2 options:
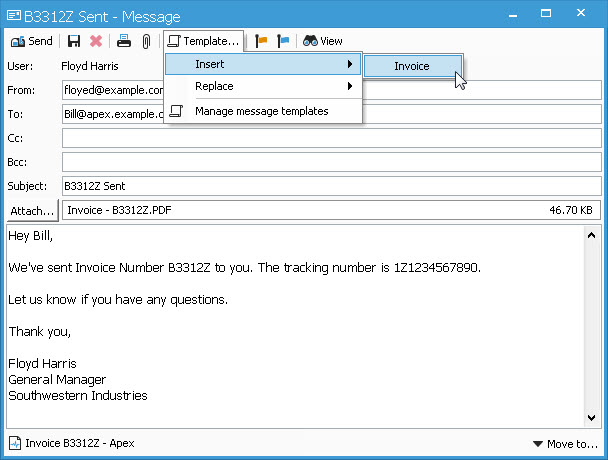
- Insert - Insert the specified email template into the Subject and body. If there is already a Subject and Body, this option will add to the Box of the email based on where the cursor resides in the window.
- Replace - Replaced the Subject and Body with the selected email template
- The information entered when the template was created will appear in the provided fields. This can be modified for the current email once selected.
- Enter all other information (i.e. the recipient, Cc recipient and Bcc recipient).
- When you are ready to send the email, click the Send Message button (or press Ctrl + Enter).
Type Options
All
Template will be available in every window with email functionality.
Activity
Template will be available only within the Business Activity window and the Service Scheduling window. In the Business Activity window it will be available from the Send Email button in the toolbar and in the Discussion > Contact.
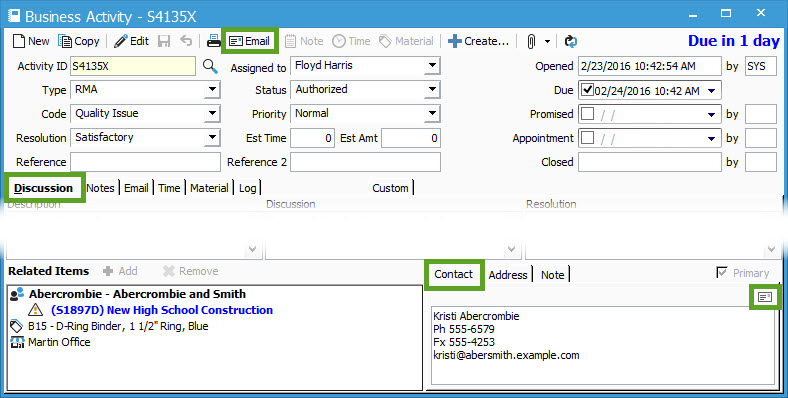
In the Service Scheduling window it will be available from the Send Msg button in the toolbar.

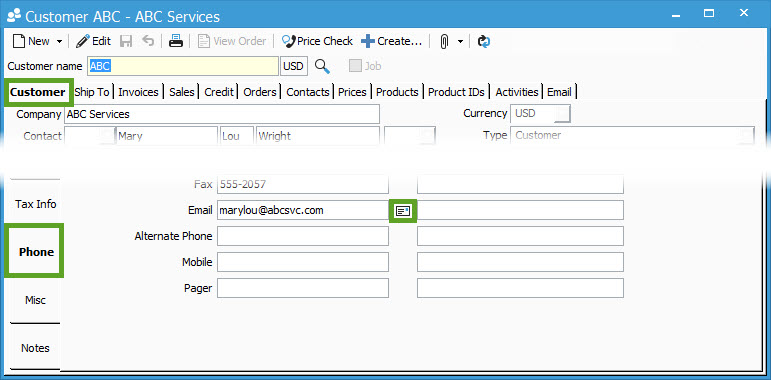
Customer
Template will be available only within the Customer Information window, from the Send Email button on the Customer tab and Credit > Phone side-tab > Email field.
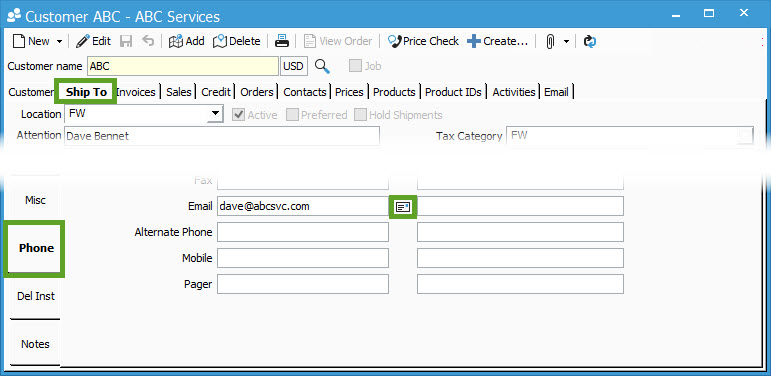
Customer Ship-To
Template will be available only within the Customer Information window, from the Send Email button on the Ship To > Phone side-tab > Email field.
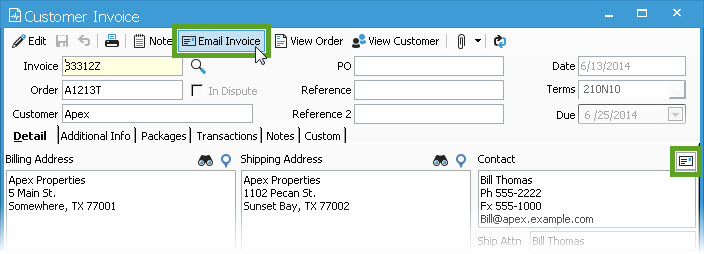
Invoice
Template available within the Customer Invoice window from the Email Invoice button and the Send email button on the Contact section.
Order/Quote
Template will be available within the Sales Order and Sales Quote window, from the Send Email button in the Contact section and using the Email option on Order forms.

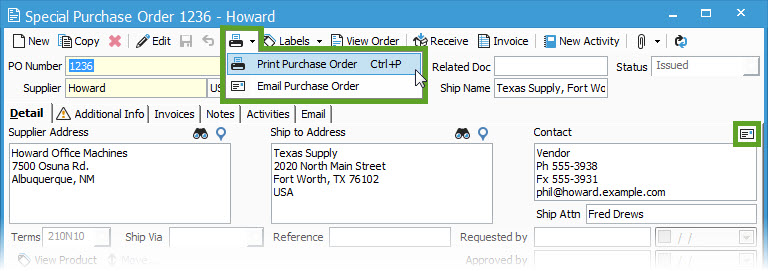
PO
Template will be available only within the Purchase Order window, from the Send Email button in the Detail > Contact section or using the Email forms option.
Track and Trace
This is only available within the Track & Trace add-on module from the Track & Trace window.
