You can create users and assign specific permissions to that user to limit their access as necessary. Users also have options related to email and startup options. To create a user by copying an existing user, please go here.
To create a new user in Acctivate:
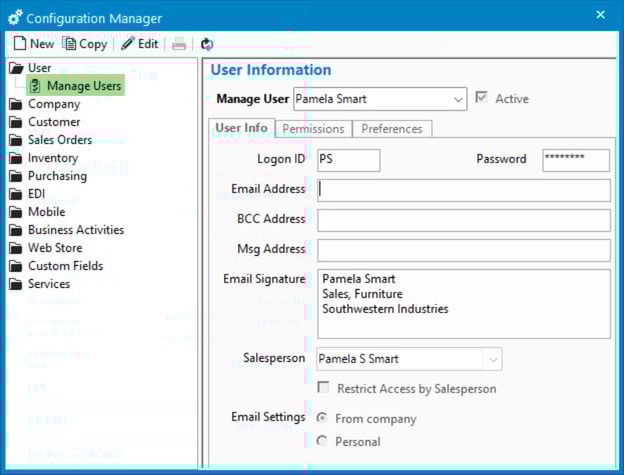
- Go to File > Configuration Management > Users > Manage Users
- Click New at the top of the Configuration Manager window.
In the right side of the configuration manager you will see 3 tabs:
- User Info
- Logon ID: This is the user Logon ID. This can be a maximum of 3 characters.
- Password: This is the password associated with Logon ID. It will be masked on this screen and encrypted in the database.
- Full Name: This is the full name of the user.
- Email Address: This is the email address that is used if you are using MAPI email configuration. This is required if the user wants to send emails through Acctivate.
- Msg Address: This is the email address used when the "Send Msg" option for Business Activities/Scheduling is enabled.
- Email Signature: Enter a text signature that will be included in emails sent by the user.
- Salesperson: If filled in, the salesperson will default to this when looking at the Business Alerts window.
- If "Restrict Access by Salesperson" is selected, then the user can only see customers and orders that are for that salesperson.
- Email Settings: Choose to send from company or personal.
- Permissions: Each section of Acctivate is broken out with the ability to assign Full Access, No Access, or Custom.
- Preferences: Startup Options, Popup Windows, and User Preferences are all toggled here.
To setup specific user permissions, or for more information on setting up users, check out our docs site.