Creating Picklists for Multiple Orders.
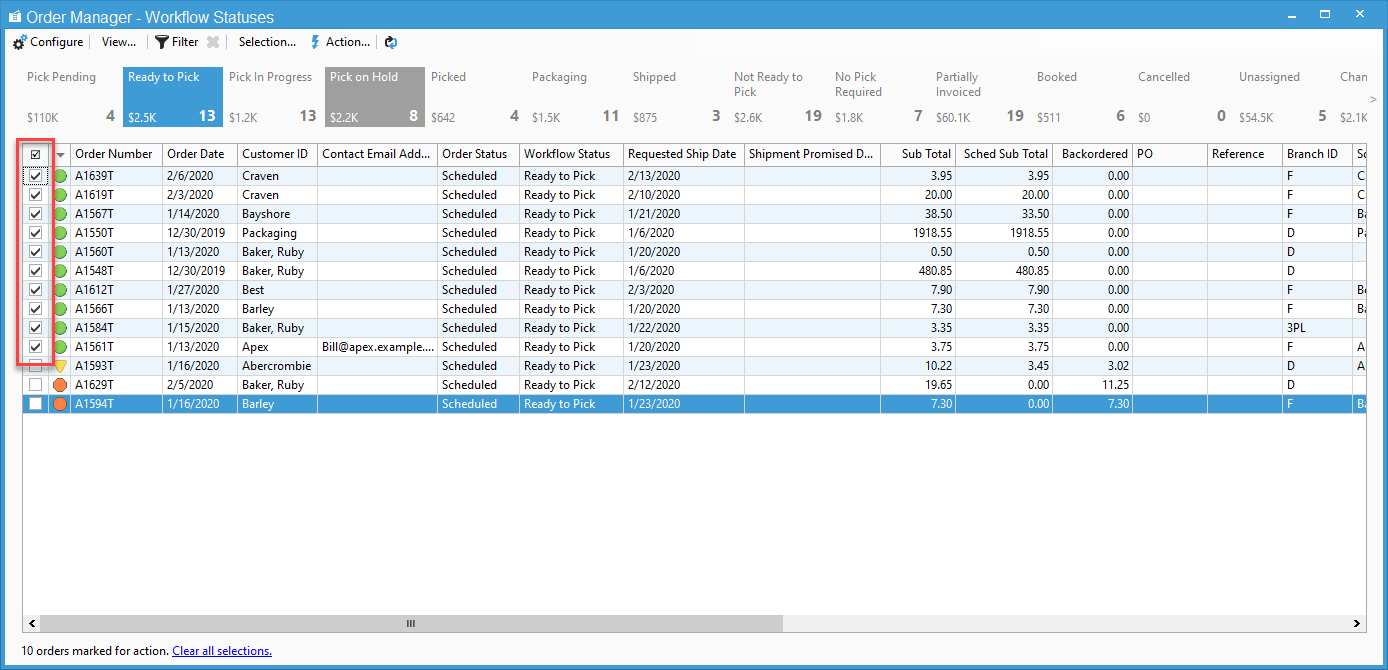
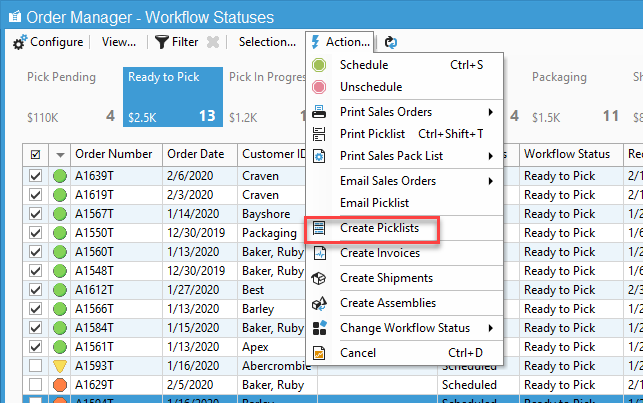
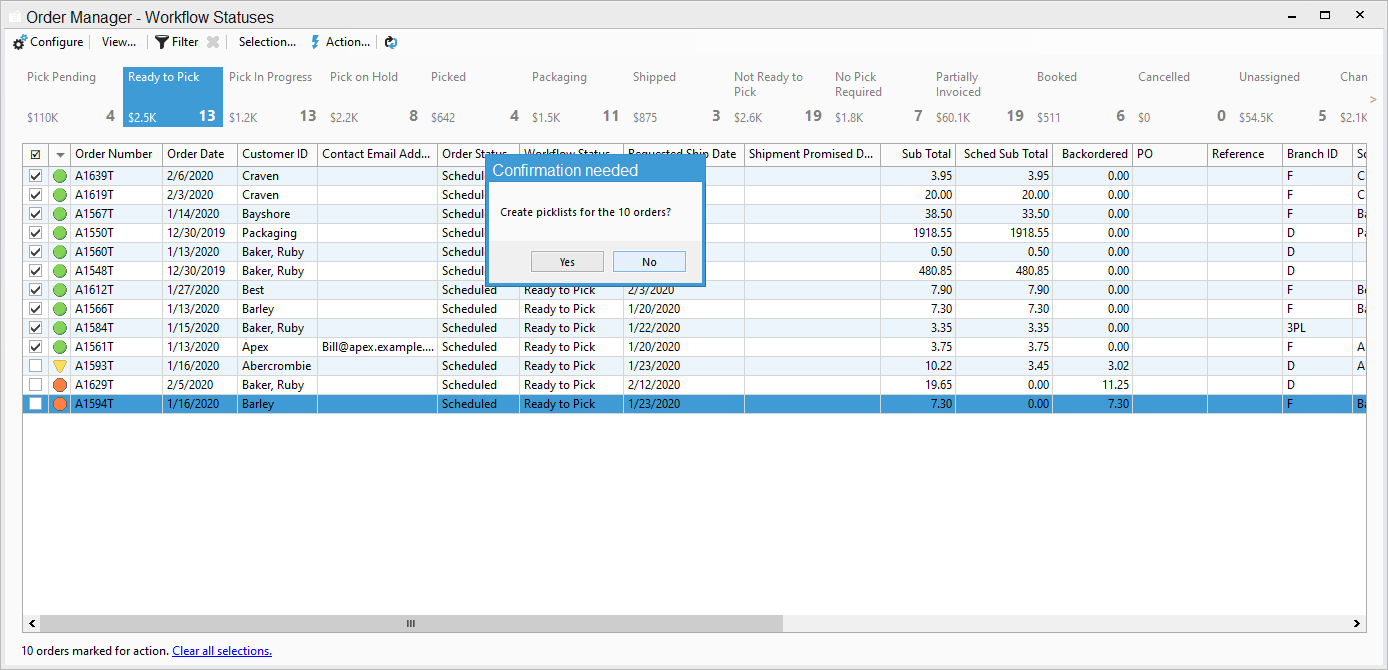
Check the required orders within Order Manager then click the Action button and Create Picklists.
1. Open Sales Order Manager.

2. Select the Orders you need to Create a Picklist for.
3. The 'Action' Button should be accessible at this point. Click on it and find the 'Create Picklists' option. You'll need to confirm you want these created.
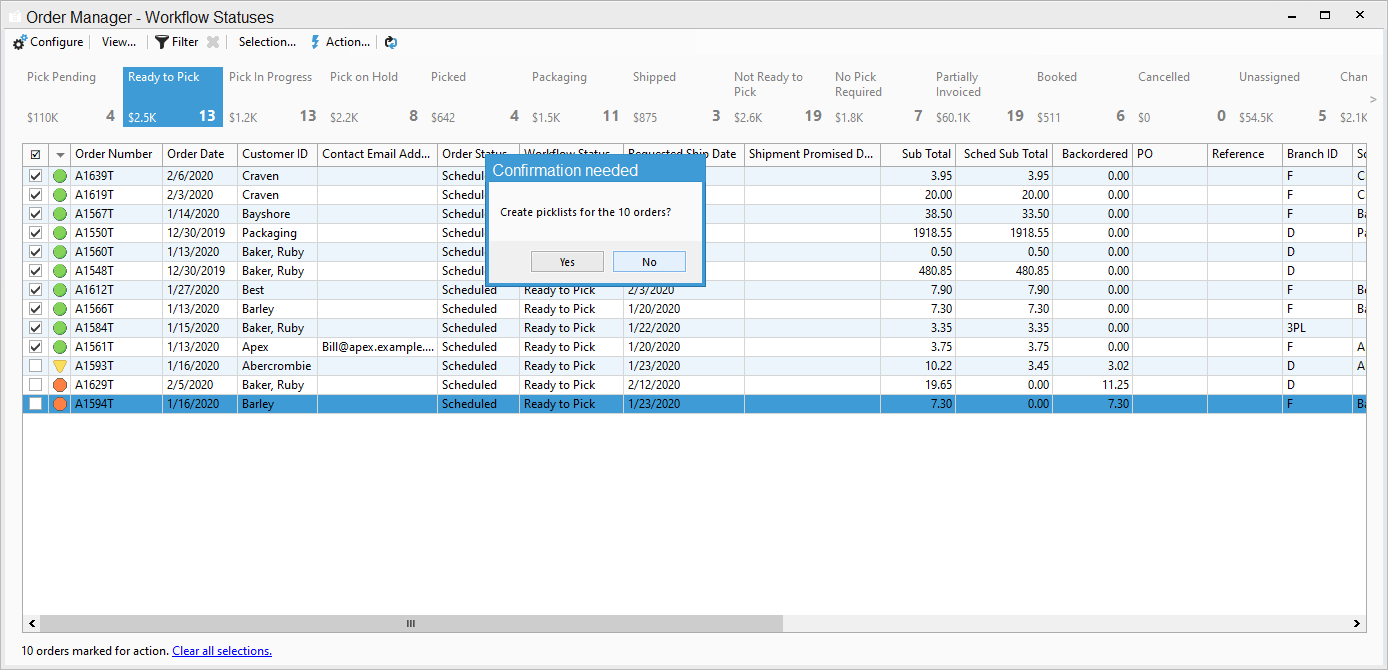
4. You will also need to confirm if you want one Picklist per warehouse (select Yes) or Multiple Picklists (Select No).
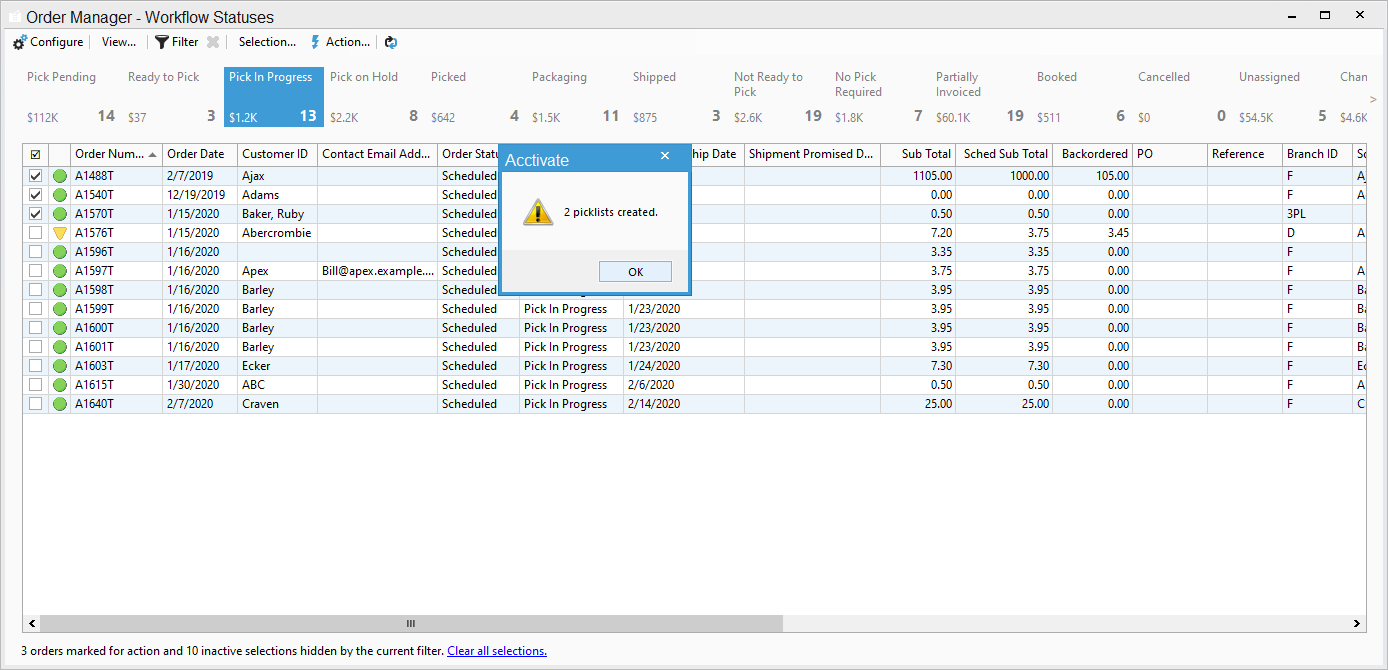
5. You should get a confirmation screen showing you the number of picklists created. Your Picklists are now created.
