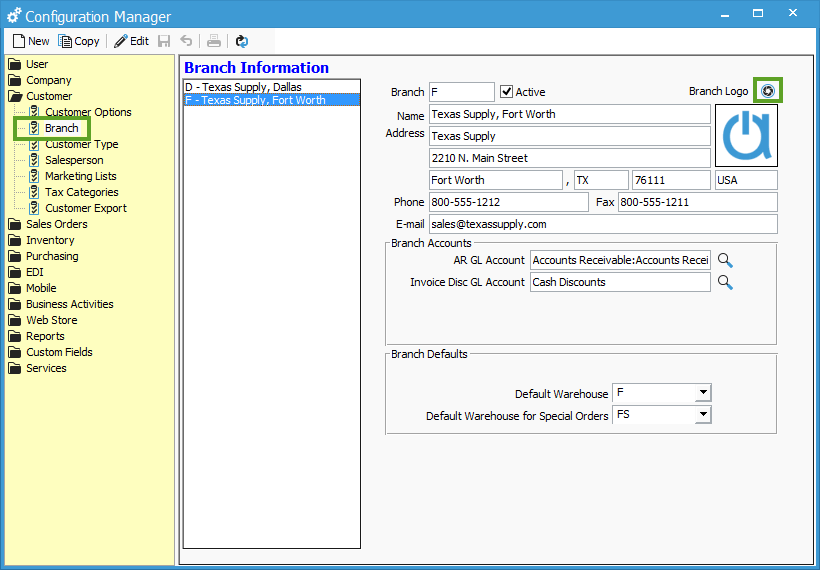
Editing branch information.
For information how to edit your branch settings, look over this guide.
Branch information is updated in Configuration Manager under File > Configuration Management > Customer > Branch.
In this section of Configuration Manager, you can edit information for an existing branches or Create a New Branch.
This information includes the name, address, phone, fax, email, logo, GL account for Accounts Receivable/Invoice Discount, and any Branch Defaults.
To edit the Branch information, follow the steps below:
- Highlight which Branch you wish to modify
- Click Edit
- Override the fields which need modification. Most fields are text, but there are some that utilize a look up function which are listed below:
- Click the camera icon to select a logo (gif, jpg, bmp)
- Use the magnifying glasses next to the Branch Accounts to select the proper GL Accounts from your QuickBooks company
- Choose which warehouse will pull in automatically for the branch from the drop down menus, if applicable
- When QuickBooks Classes are associated with Branch, use the magnifying glass to select the proper option
- Any changes made on the Branches will go into effect after everyone restarts Acctivate (close and reopen the software).
