Editing Lot/Serial Numbers.
Product > Find the Serial Number on the Transaction Tab > Find the Serial Number on the Serial #s tab (or Lots tab for Lot Controlled products) > Click Include Inactive Serial Numbers > Click on the line of the Serial Number > Edit
From time to time, a user may accidentally enter an incorrect Lot or Serial number into Acctivate. This article will show the easiest way to correct this and enter the correct Lot or Serial Number. The example below shows a Serial Controlled product, but the steps for a Lot Controlled product would be exactly the same.
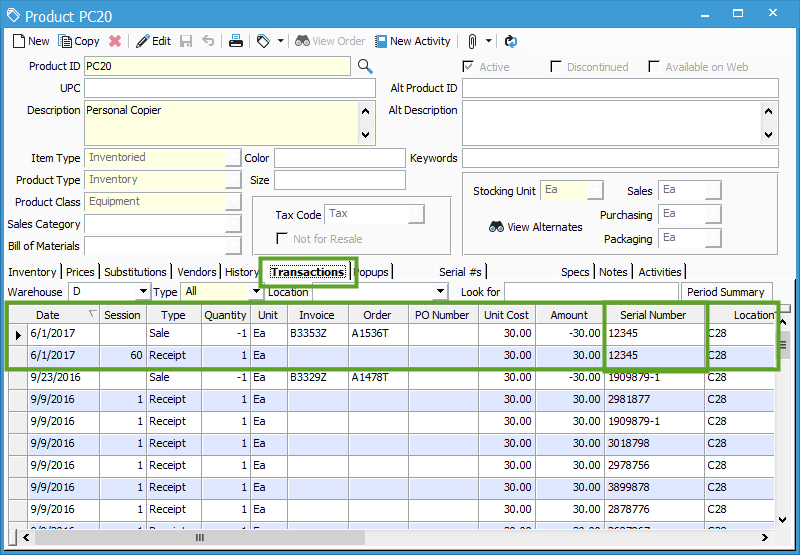
In the screenshot below, notice on the Transactions tab that a Receipt was posted which established Serial Number 12345, then on that same day the Serial Number was sold.

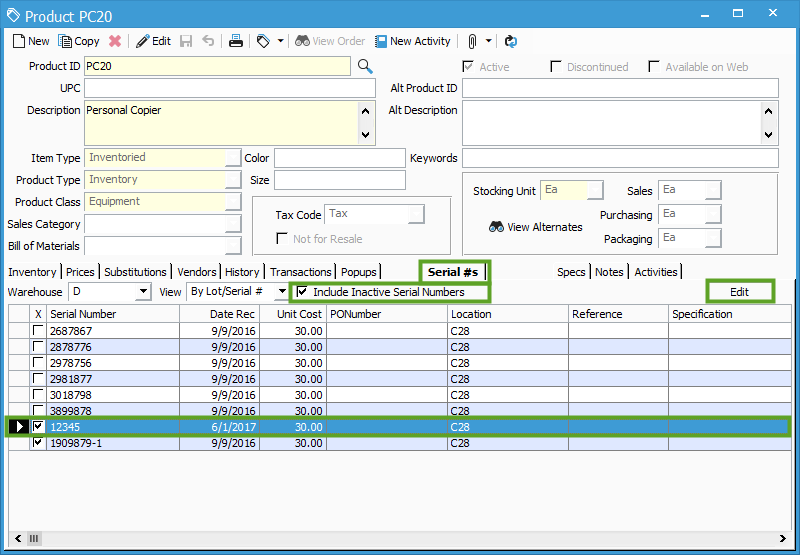
Let’s assume that Serial Number 12345 should instead have been 54321. To change this, first find the Serial Number on the Serial #s tab (‘Lots’ tab for Lot Controlled products). Keep in mind, if that Serial Number has already been sold, you may need to check the “Include Inactive Serial Numbers” box to find it. Click on the line for the Serial Number you need to change, then click Edit. This will bring up the Serial Number Information window.

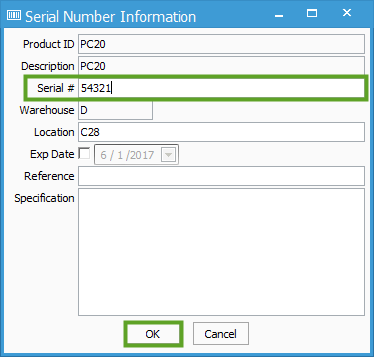
In this window, simply change the Serial Number to be correct, then click OK.

This will update the Serial Number to be correct on the Serial #s tab, as well as all Transactions/Sales where this Serial Number has been used.

