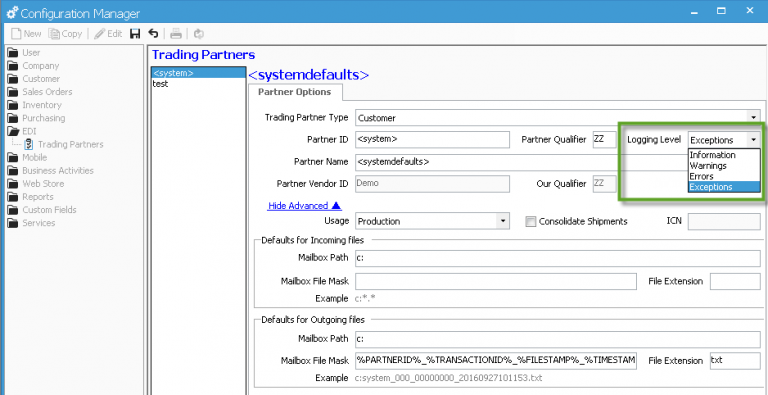
Enabling EDI Logging.
Enable EDI Logging
By default, only exceptions are written to the Acctivate exception log when opening or refreshing EDI. This minimizes the amount of data written to the log. However, users may want to increase the level of logging if you are troubleshooting a warning or error.
- In Acctivate, go up to File -> Configuration Management
- Double-click EDI in the tree to the left to open the EDI configuration.
- In the Trading Partners tree, select the <system> value. Here, you can find a number of EDI defaults and settings.
On the right-hand side, you will find a drop down option called “Logging Level”. 
There are four different levels for logging.
- Exceptions (default) – writes to the exception log only exceptions received.
- Errors – writes both exceptions and any red errors received.
- Warnings – logs all exceptions, red errors, and yellow warnings received.
- Information – this option writes all exceptions, errors, warnings, and any other data available when opening or refreshing EDI.
Be advised, selecting the Information logging level should only be a temporary change, used for debugging or troubleshooting errors or issues. Permanently selecting this option would write excessive amounts of data to the exception log, and would also degrade performance of EDI processing due to Acctivate constantly writing to the log.