In this article, the various screens of the Acctivate Sales Order window will be briefly explained.
Accessing the sales order window
- Click the Sales Order menu item in the Sales menu.
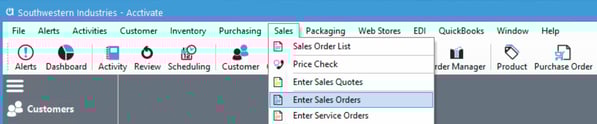
- Or use the Sales Order icon in the toolbar.

New Sales Order
After opening the window, you can enter a new order by clicking “New”, or open a previous order using the order lookup (F4). For more information about how the Sales Order entry process flows in Acctivate, refer to our sales order training page.. Below is an example of what the Sales Order window looks like before looking up an existing order or creating a new one:

Order Numbers are generated automatically, although they can also be manually overwritten. To set up custom automatic order numbering, refer to our Document Numbering Guide.
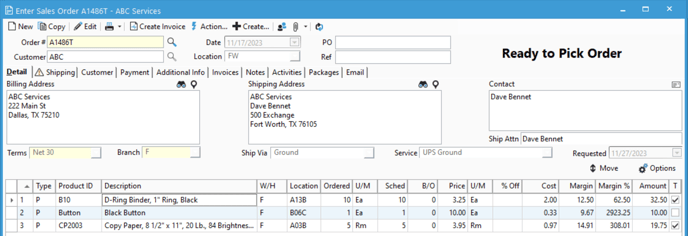
Order Detail Tab
The Detail Tab contains the most important information on a Sales Order. Here, users can clearly see customer address information (billing and shipping), contact information, and line items on the order. Users can update Order Status and Workflow status as the Sales Order is updated. Below is an example of how information is laid out on this tab.
The columns showing in this grid are customizable by an Acctivate admin using the "Options" button.
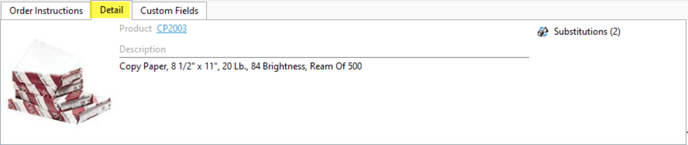
Line-Item Details
The line-item detail tab appears in the footer of the sales order window and contains information about the line item. If the line item has any substitutions, then a substitution button will appear allowing you to select them. If the line item is a kit, then the Kit Components button will appear allowing you to select the components. You can also click the blue hyper link to open the product in the Product list window.
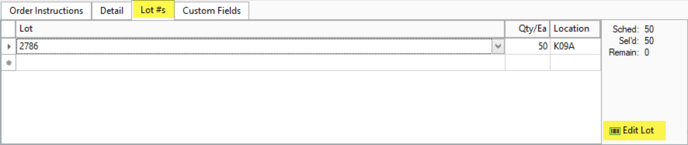
Lots Details
If the line item selected is a lot numbered product, then a "Lot #s" tab will appear in the footer of the sales order window. If you're in edit mode, you can select the lots to allocate to this order.
You can also click the "Edit Lot" button to open a window to quickly change lot attributes such as name, expiration date, note, etc.
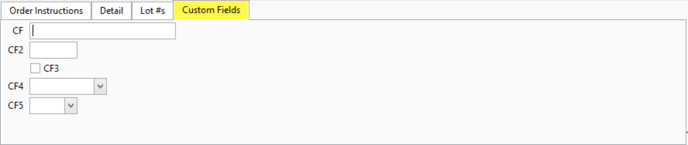
Custom Fields details
If the line item selected has custom fields, then a "Custom Fields" tab will appear in the footer of the sales order window. If you're in edit mode, you can enter in data to these fields. You can also show these fields in the grid by adding the columns in the Options menu.
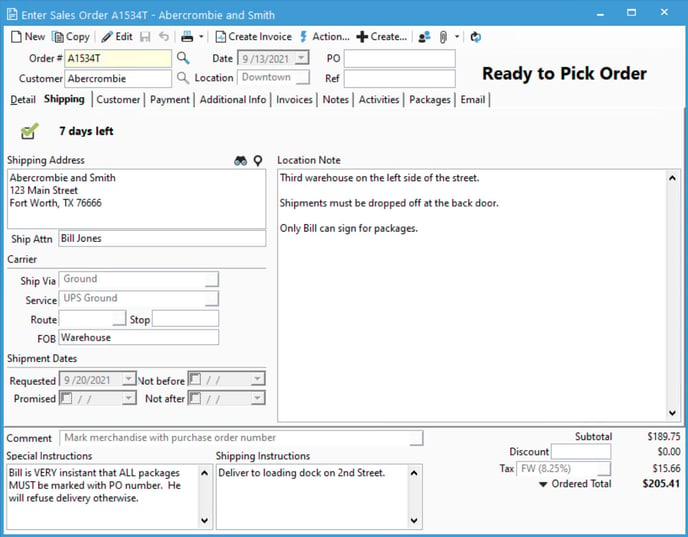
Shipping Tab
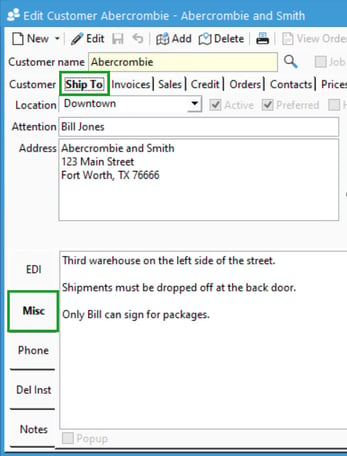
The Shipping Tab of the Sales Order window contains more detailed information related to shipping the order to the customer. Here, the Shipping address, Carrier details, and relevant dates (Requested, Promised, Not Before and Not After). Clicking the pin icon  will open your default web browser, displaying the Shipping address in Google Maps. The Show Address icon
  will open a dialog box, allowing you to edit each line of the Shipping address. The Location Note field is non-editable on the Sales Order but can be updated on the Ship To tab of the Customer window.
Customer Tab
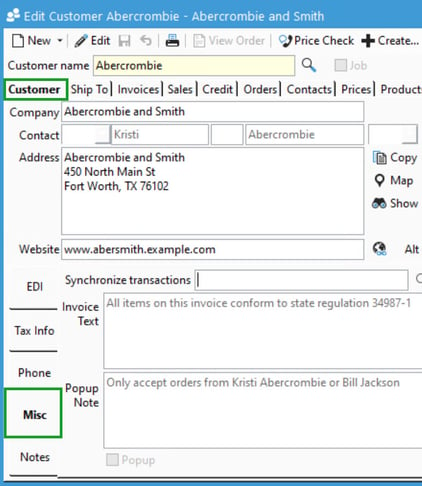
The Customer Tab contains relevant information about the customer that placed this Sales Order. This includes their Billing Address (including and functions similar to the Shipping Tab), Customer Type, Marketing Code, Tax Code, and any notes saved on the Misc tab of the Customer window. General customer credit information is also displayed here; in this example, ABC is over there credit limit, so a warning icon will appear next to the Customer tab. Users can override this limit by clicking Edit, then “Approve Credit”. If the credit has been approved, Acctivate will display the username and time in which the credit hold was lifted.

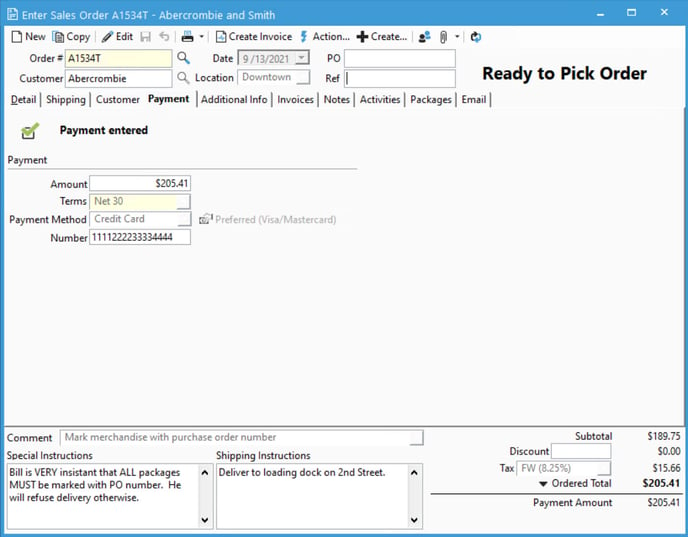
Payment Tab
The Payment Tab contains information about payments applied to this Sales Order. Users can enter payment information here, which will then carry over to the invoice when clicking “Create Invoice”.
Additional Info Tab
The Additional Info tab contains sections for the Origin, Sales, Reference, Timeline, and Custom fields.
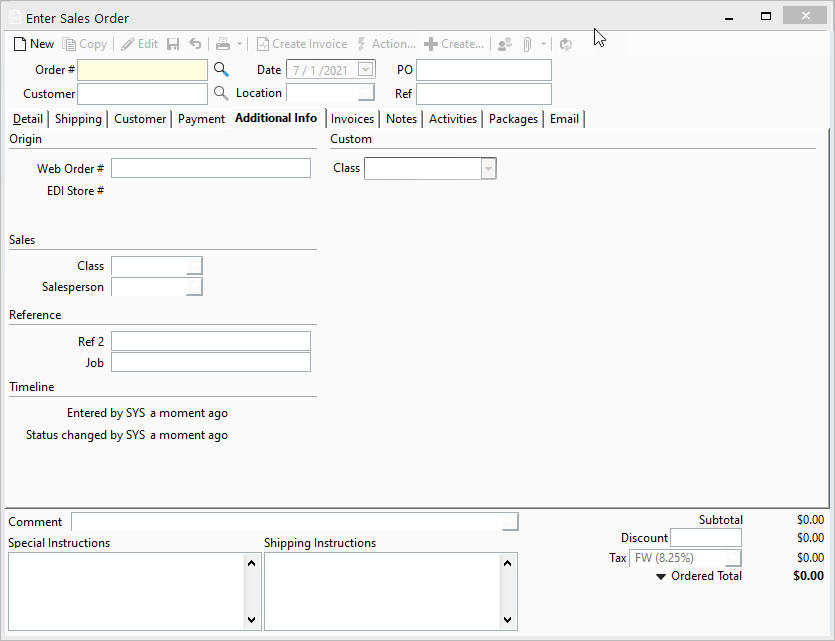
The Origin section will contain the Web Order # or the EDI Store # depending on whether or not the Sales Order was imported via Webstore or EDI.
The Sales section will contain the Salesperson and Salesperson class associated to the order.
The Reference will contain the Ref 2 and Job field per customer.
The Timeline contains a timestamp of the last date and time a user changed the workflow status of the Sales Order. Also, it will show which user changed the workflow status.
The Custom field will show all of the Custom fields created in Configuration Manager for Sales Orders. Refer to this article if you would like to find out how to create a custom field.
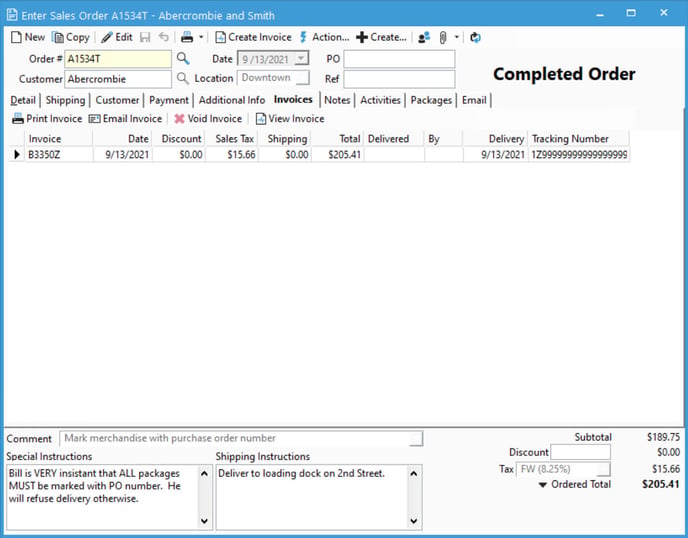
Invoices Tab
The Invoices tab contains all invoices associated with the current Sales Order. You can View, Print and Void Invoices here, although invoices must be created first before appearing in this list.
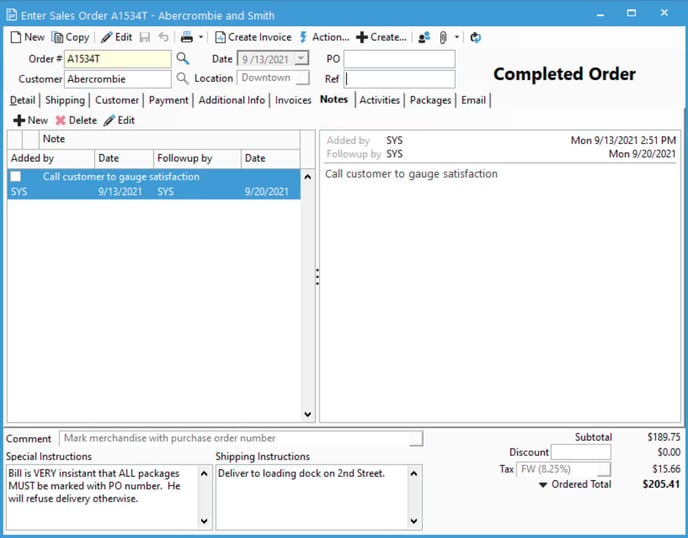
Notes Tab
The notes tab will contain any notes added on the order. If a follow up date is specified, the note will appear in the reminders tab of the Business Alerts window the day the follow up is due.
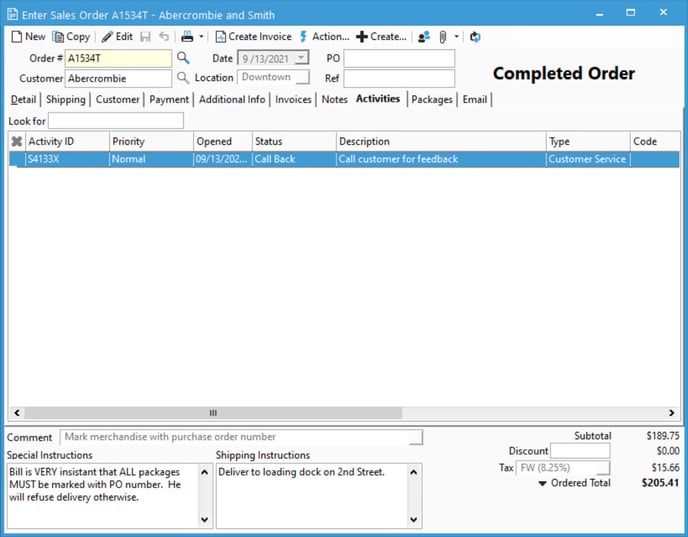
Activities Tab
If any Business Activities have this order related to it, a list of those Activities will appear in this tab. This list will include the ID, Priority, Open Date, Status, Description, Type, and Code of the Business Activity.
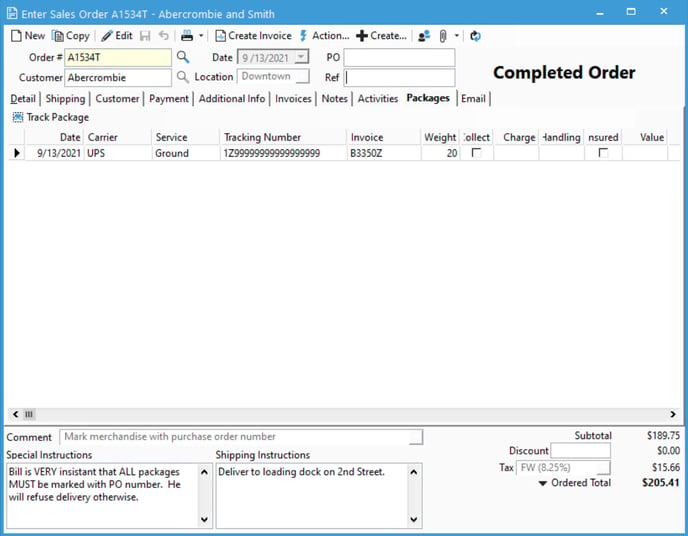
Packages Tab
If any shipments exist for this order, relevant package information will be found on the Packages Tab. This includes shipment information entered on the Invoice screen, created in Acctivate’s Package Manager, or exported from a shipping workstation such as UPS WorldShip or Fedex Ship Manager.
Email Tab
The Email tab will contain all emails sent to the Customer from the Sales Order screen. To email a customer from the order, click the printer icon and select an option from the menu. Emails may also be dragged from Microsoft Outlook and dropped into this tab while the Sales Order is in Edit mode.

Order Instructions/Footer
At the bottom of each tab on the Sales Order window, users can enter a Comment, Special Instructions or Shipping Instructions relevant to the order.
- The Comment field is for general comments for the customer, the order or both. A new comment can be entered or selected from the drop-down menu of user defined comments.
- The Special Instructions text box is for information that is kept confidential and will not be displayed on any invoice, order or customer-viewed document.
- The Shipping Instructions text box is for information that you want printed on the shipping documents
- The Subtotal, discount, tax, ordered total and payment amount will also show in this footer.
