The Configuration Manager gives you the option of creating and defining custom fields unique to your business. These fields can appear on several windows. This includes Business Activities, Customer Information, Sales Order, Sales Order Detail, Sales Invoice, Sales Invoice Detail, Product Information, Purchase Order and Purchase Order Detail windows.
Setting and Defining Custom Fields Basic Steps
- Select File > Configuration Management from the Acctivate desktop to open the Configuration Manager.
- Select the Custom Fields folder.
- Click the Edit button to begin creating custom fields.
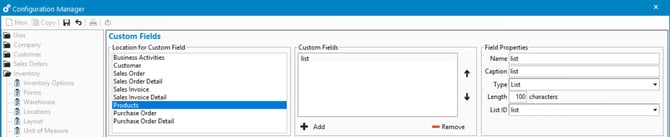
- Select the Location for Custom Field, based on where you'd like the custom field to appear.
- Click the ➕ Add button in the Custom Fields section. The word New will appear, in the Field Properties section; place your cursor in the Name field.
- In this Name field, type the field ID you want the system to use. No spaces are allowed for this field. This is an internal identifier in the database.
- The Caption field will automatically copy from the Name, adding spaces. You may modify if you'd like to display the caption differently in Acctivate.
- Select the field Type of information you want stored in the Custom Field. You may choose from the following types:
- Follow the steps below for each type of Custom Field.
Numeric, Currency, Checkbox or Date custom field
- Follow the steps above to Set up and Define Custom Fields.
- Click Save if finished or ➕ Add to repeat process adding additional custom fields.
Text custom field
- Follow the steps above to Set up and Define Custom Fields.
- Enter the maximum number of characters you expect will be needed in the Length [ ] characters box. Acctivate will not allow entry of more characters than you have defined.
- Click Save if finished or ➕ Add to repeat process adding additional custom fields.
List custom field
- Follow the steps above to Set up and Define Custom Fields.
- Enter the maximum number of characters you expect will be needed in the Length [ ] characters box (Acctivate will not allow entry of more characters than you have defined).
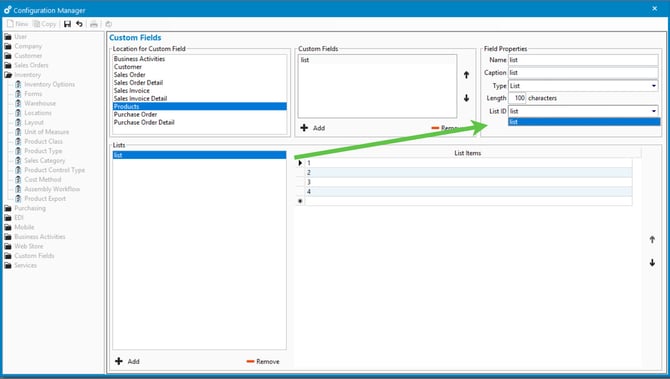
- An additional field called List ID will appear (this will have no options available a list has not been defined in the Lists section below).
- To define a List ID Click the ➕ Add button in the Lists section below. A window will appear and allow you to name the New Custom List (this will be the name that appears in the List ID above).
- Click in the first blank line of the List Items section to add items to be selected by your users. Once you add an item, a new line will appear below. Enter as many list items you need for the Custom List.
- Now, select the List ID in the Field Properties section above.
- Click Save if finished or Add to repeat process adding additional custom fields.
When finished perform any one of the following steps
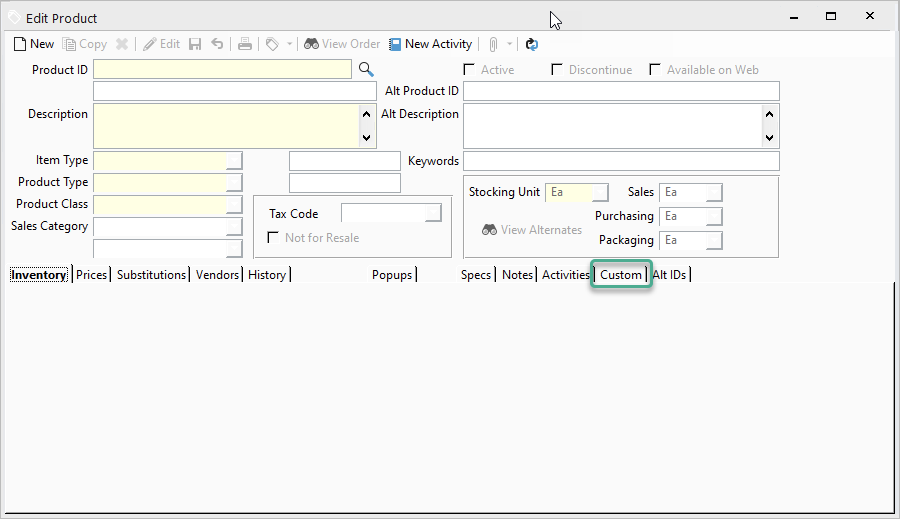
- When finished with custom fields, click the Save button and close configuration manager. View your custom fields on the window that corresponds to the location where you added the field. The new custom field will display on the Custom tab of the window you selected above.
- To remove a custom field, click the Remove button under the Custom Fields.
- To create a custom field in a different form, select the appropriate form and repeat steps above.
For more information about custom fields, check out our docs page.