Acctivate allows users to assign specific reports to print from a certain printer by default. This can be helpful when printing product labels with barcodes, or to simplify the use of multiple printers in the same office.
- In Acctivate, go to File -> Manage Reports
- Locate the report you'd like to set a printer for.
- Click the Edit button.
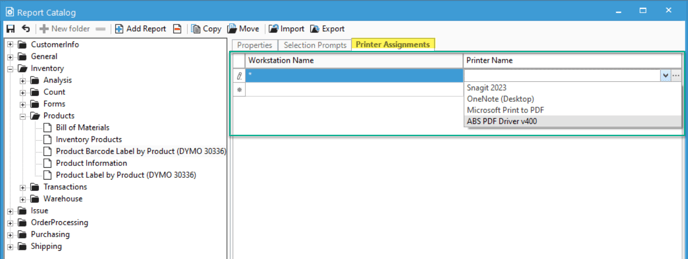
- Click on the Printer Assignments tab.
- Select the first blank row in the list and type in the workstation name.
- This is the PC name in Windows. You can access this by searching "View your PC name" in windows.
- You can also enter "*" (without quotes) to assign the printer to all workstations.
- Select the printer from the drop down in the Printer Name box.
- Click the save icon.