Acctivate allows you to add various selection criteria to your reports, which enables you to filter reports to pull the exact information you need. To add report filters, follow the steps in this article.
Add or Update Selection Criteria to a Report
- In Acctivate, select File > Manage Reports.
- Locate the report you'd like to add filters.
- Click on the Edit button.
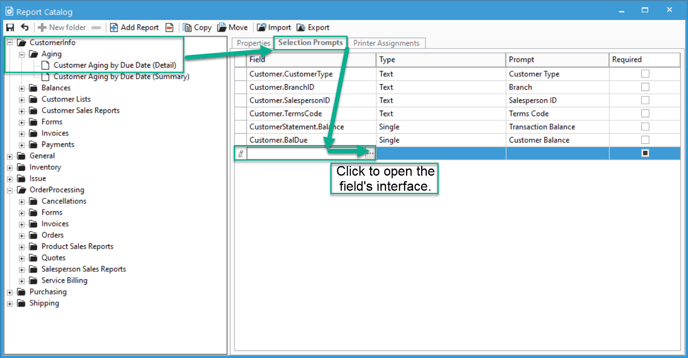
- Select the Selection Prompts tab.
- Click on the blank row under the last listed selection prompts and then click the ... button.
- A list of database tables that are used in that report will appear. Click the '+' icon next to the name of the database view that corresponds with the field you want to filter by on the report. If you have questions about what fields may be found in what views, see our docs page for view definitions.
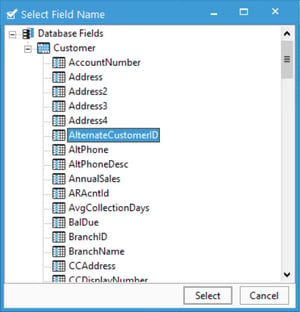
- Locate the field you want to filter by and click the "Select" button.
- Be sure the filter Type is set appropriately. Acctivate will auto-assign this, so your input will very rarely be required.
- Enter the desired name of the filter on the report into the Prompt field. Acctivate will auto-assign this to the database field name.
- Check the Required checkbox if you want this filter to be required to run the report.
- Click on the Save icon to save your changes.
Please Note: If you cannot locate the table containing the field you want to filter by, the report may not contain the field in that report. You will need to add the table in Crystal Reports.
Your report will now contain the new filter that you've added! If you change your mind later, you can delete filters in Configuration Manager by highlighting them and hitting the Delete key. Be sure that you're in edit mode by clicking the "Edit" button.
For more information about this, check out our docs.