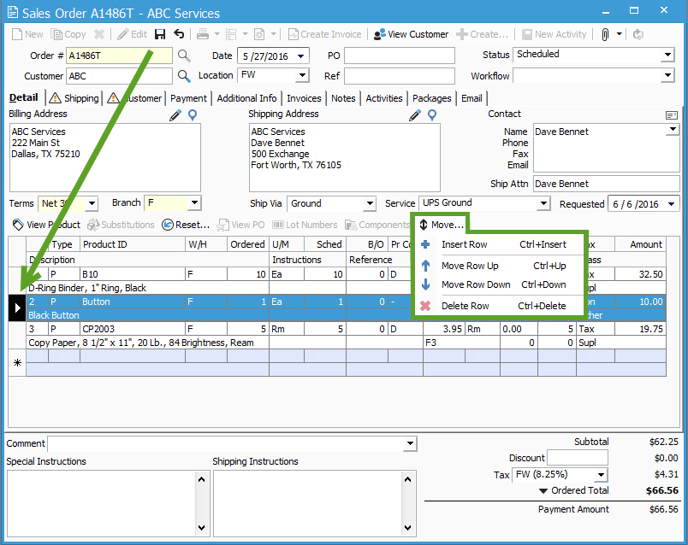
Inserting, moving and deleting rows on Sales and Purchase order windows.
Users have the capability of Inserting, Moving, and Deleting rows from both the Sales and Purchase Order windows. This function can be very handy when there is a need to insert notes or sort the lines. Below you will see two options for how to utilize this function.

Option 1: Use the Move Drop Down Menu
- Click the Edit button on the Sales or Purchase Order window.
- Select the row you wish to Insert, Move, or Delete.
- Click the Move drop down
- Select the preferred option: Insert Row, Move Row Up, Move Row Down, or Delete Row.
Option 2: Use the Keyboard Shortcuts
- Follow steps 1 & 2 above.
- Use the following shortcut keys rather than selecting an option from the drop down:
- Insert: Ctrl+Insert
- Move Row Up: Ctrl+Up
- Move Row Down: Ctrl+Down
- Delete Row: Ctrl+Delete