Using Business Alerts for re-ordering.
Business Alerts are one of Acctivate’s Decision Support Tools, it alerts users of issues, such as at-risk deals, customer service issues, low stock or other items needing attention.
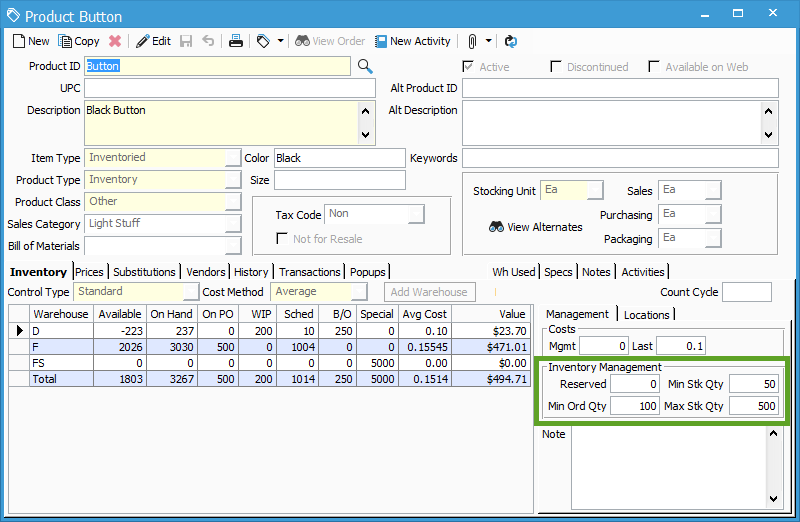
The Reorders tab gives the user an overview of what items need to be purchased based on the On Hand quantity, as well as the specifications selected on the Inventory Management portion of the Product Information window per warehouse record. In this section, you can specify the Reserved, Min Stk Qty (Minimum Stock Quantity), Max Stk Qty (Maximum Stock Quantity), and the Min Ord Qty (Minimum Order Quantity from your vendor). Acctivate uses a reorder formula to recommend what and how much needs to be reordered. Make sure to add values for each warehouse listed on the item to get a true picture of what needs to be reordered. This is an extremely handy tool to know when you’re low on stock.
Let’s review the functionality of the Business Alerts Reorders tab and Reorder Wizard below:
1. Open the Business Alerts utility by either going to Alerts > Business Alerts or clicking the Alerts button on the icon bar.
2. From the Business Alerts window, select the Reorders tab, which contains all products that are currently below the designated restocking level. Notice the Reorder button on this tab. This is where the Reorder Function is accessed, in order to reorder any low stocked items. Users can double-click on any of the items or select the row and click View Product to navigate to the product information window.
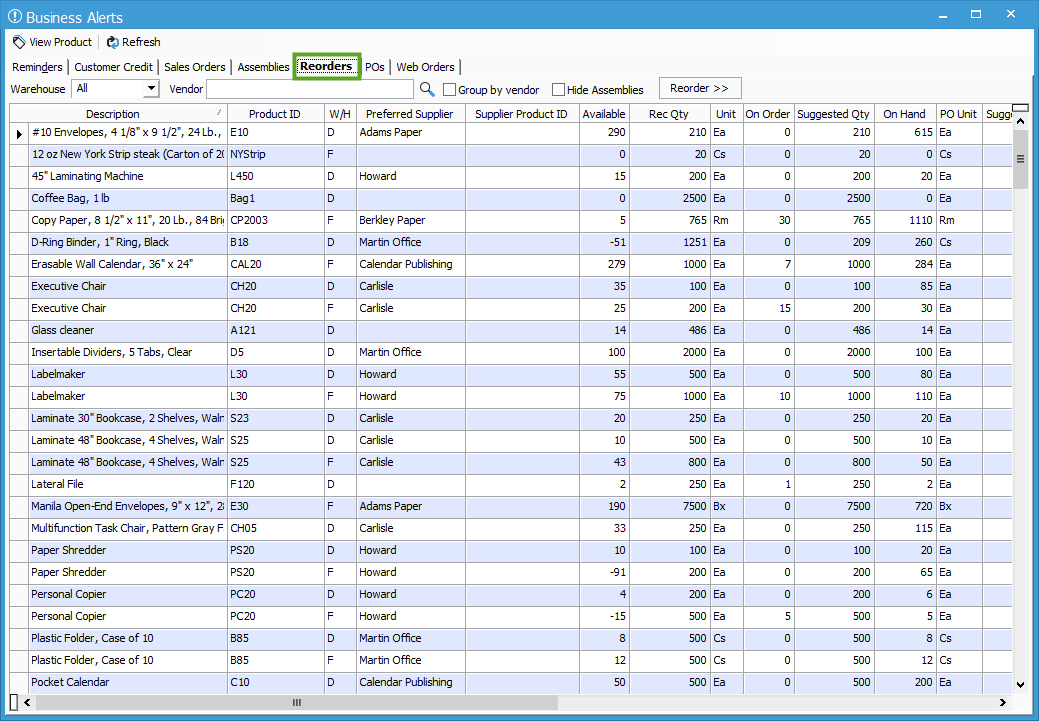
3. To look up a specific Vendor, use the magnifying glass next to the Vendor box. This will show you any item that’s low on stock which has that specific supplier listed as the Preferred Vendor.
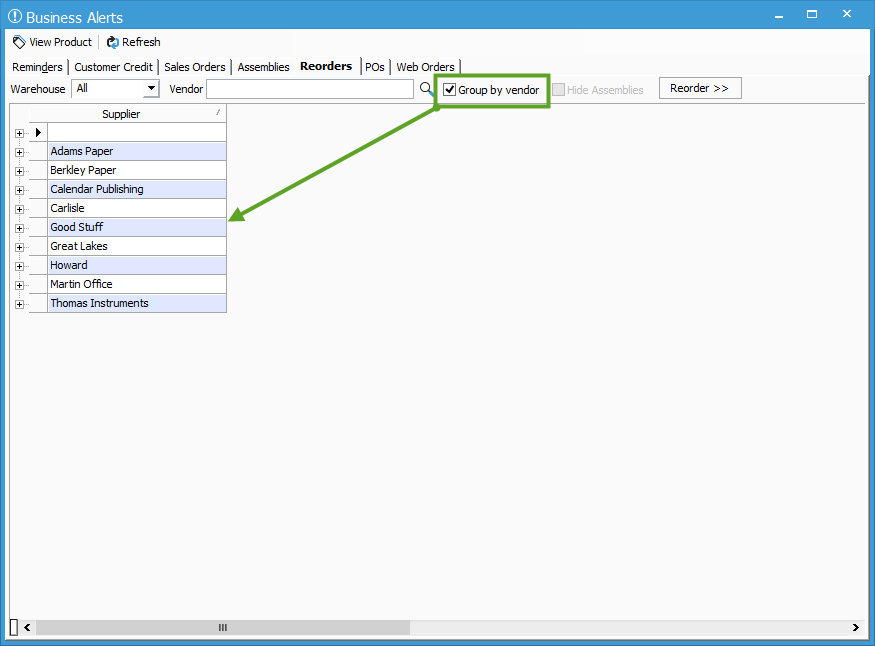
4. To see information for all vendors, click the Group by vendor check box near the top to group items by their Preferred Vendor. The blank Supplier box reflects items below their required quantity for reorder without a Preferred Vendor selected on the Vendor tab of the product.
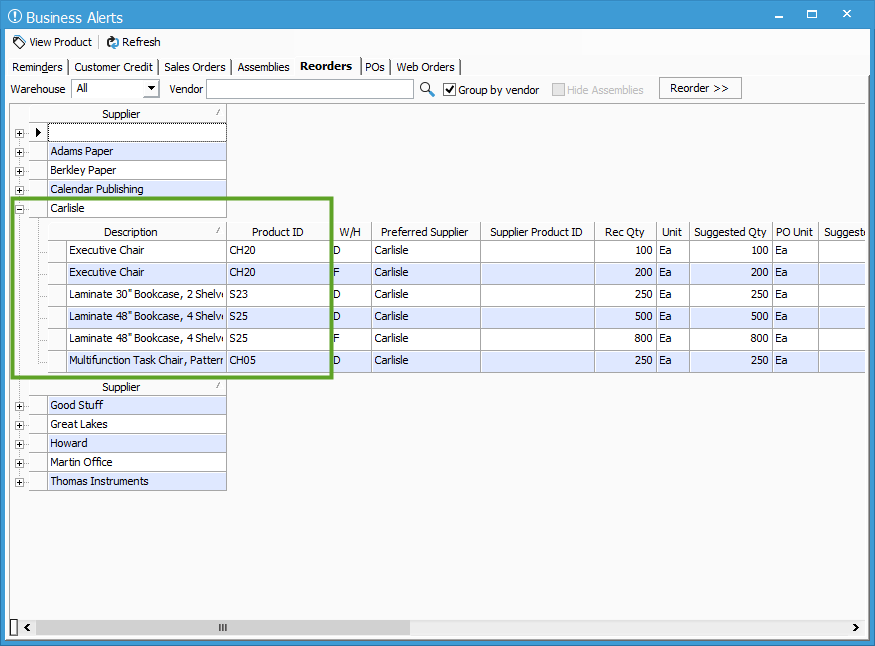
5. Expand a particular vendor to reveal products that Supplier sells.
6. If you’re ready to begin the Reorder wizard, click Reorder. You’ll notice the window changes to allow the you to select either the entire Supplier selection of items or specific items for each vendor. I’ve selected all of Berkley Paper’s items by checking the box next to the Supplier name and one item for Calendar Publishing. If you expand the blank section, you can select the PO Supplier which will then group those items into one shown on screen or add the new Supplier to the list.
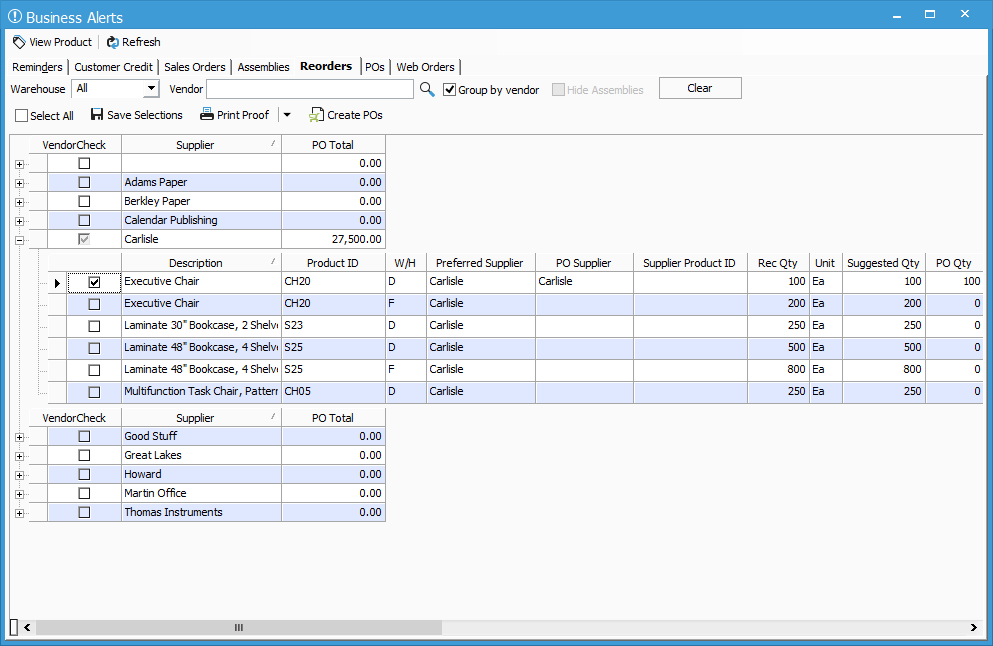
7. Once you’ve expanded a selection, you can scroll to the right to verify the reorder information. If left as is, the POs created will use the Suggested Qty, PO Unit, and Suggested Cost listed for each item. The following fields can be modified on screen to ensure the proper information is populated on the PO, if necessary:
- PO Supplier, if not ordering from Preferred Vendor
- PO Qty
- PO Unit
- PO Cost
- Lead Time
8. Notice any selections now show a PO Total per Supplier record.
9. Click Save Selections
10. Feel free to Print Proof of reorder. You can select the Inventory Reorder Proof or the Inventory Reorder Proof by Supplier by clicking the drop down next to the Print Proof button.
11. If selections are approved, click Create POs to generate a PO for any item(s) selected. In this example, there will be two POs: one for Berkley Paper and one for Calendar Publishing.
12. Acctivate will prompt you if you want to continue listing the total number of POs being created.
13. Click Yes from the prompt that appears and OK from prompt afterwards.
14. Notice that in the Reorders tab, Calendar Publishing no longer lists the items you chose (Pocket Calendar). This low stock product is now on an issued purchase order for that vendor.
15. From here there are two options, you can either open each PO individually to print or email to your vendor or go to Purchasing > Print Issued Purchase Orders to print a batch.