For the sake of this article, we'll use a core as an example. A Core is usually some fee or additional charge that may be refunded to the customer when something is returned, it is very similar to a Customer Deposit, and could be treated as such. If you prefer to keep these charges separate from customer deposits follow the steps below to configure an Other Charge item to track your Charges.
Steps to Track Customer charges:
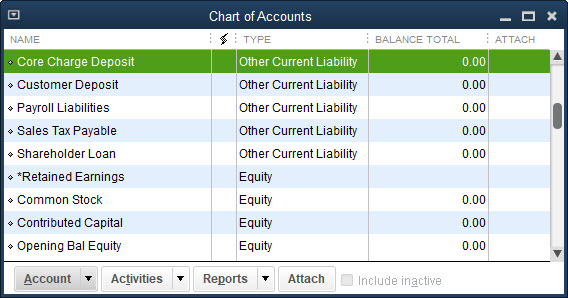
- First, you need a liability account. In QuickBooks create a new GL account with the account type of Other Current Liability. For our example, we created a "Core charge Deposit" account.
- Next, Sync with Acctivate to populate your new GL Account in Acctivate
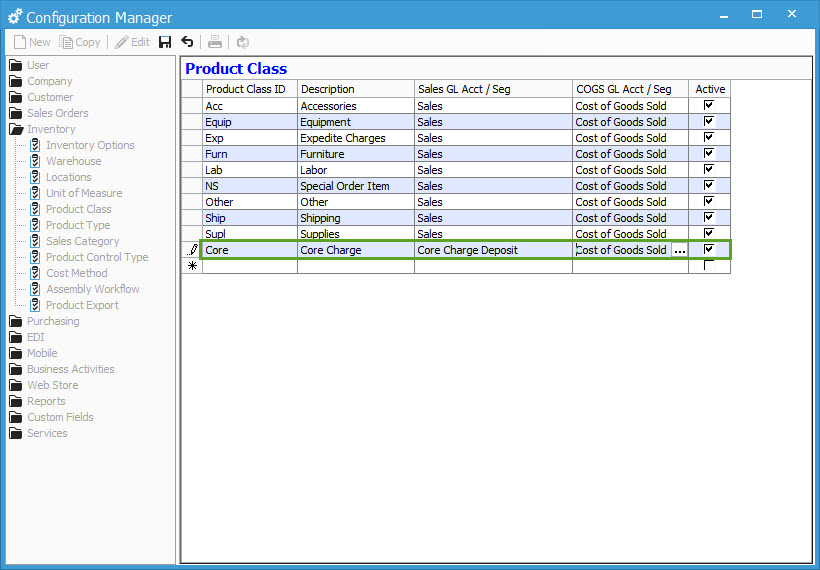
- After the sync you can create a new Product Class in Acctivate. This product class will use the newly created Deposit account. We've named ours "Core" for our example, but you can name yours to match your need.
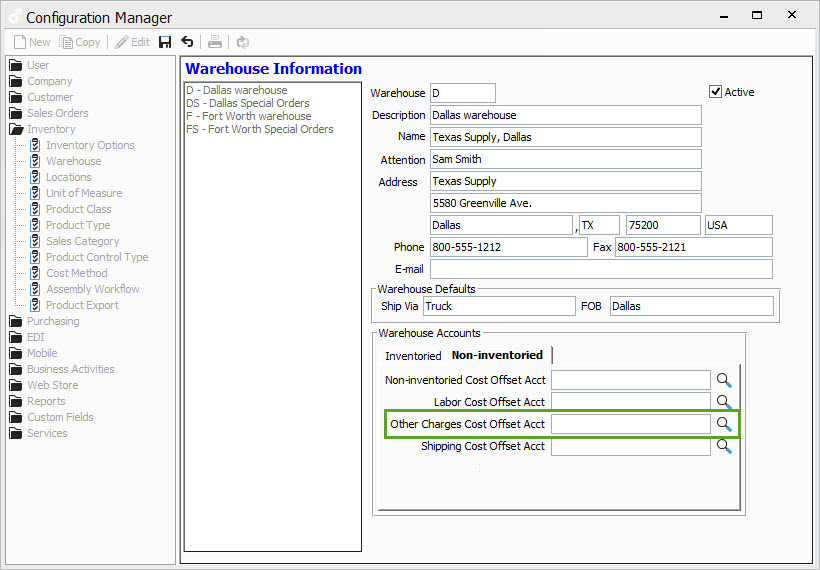
- If you're needing this to include an internal cost, you must also set your Warehouse Other Charges Cost Offset Acct on the Non-inventoried tab of the Warehouse Information.
- You should check with your Accountant to determine the correct account or set up a new one.
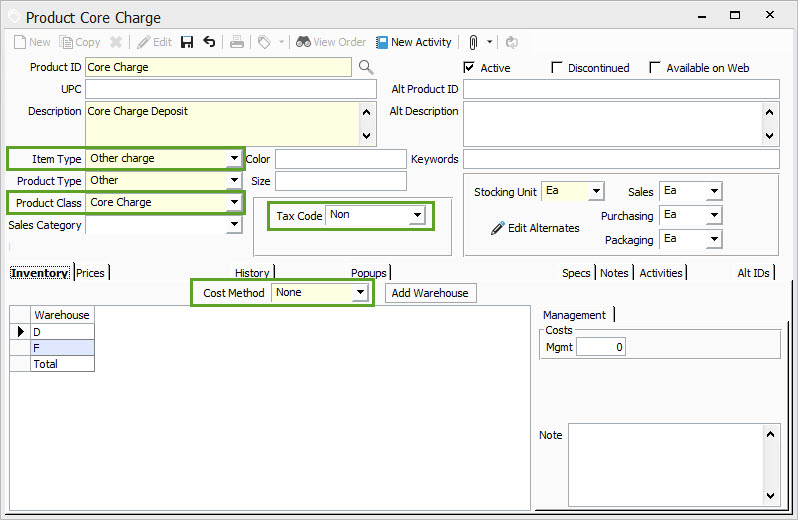
- Next create an Other Charge product called Core Charge (up to you whether you have one or more than one each specific to the part). The Cost Method would be Standard when needing to include an internal cost and utilize the cost offset account. Make sure to set the Standard cost on each warehouse listed on the product. If no internal cost is necessary, choose a Cost Method of None.
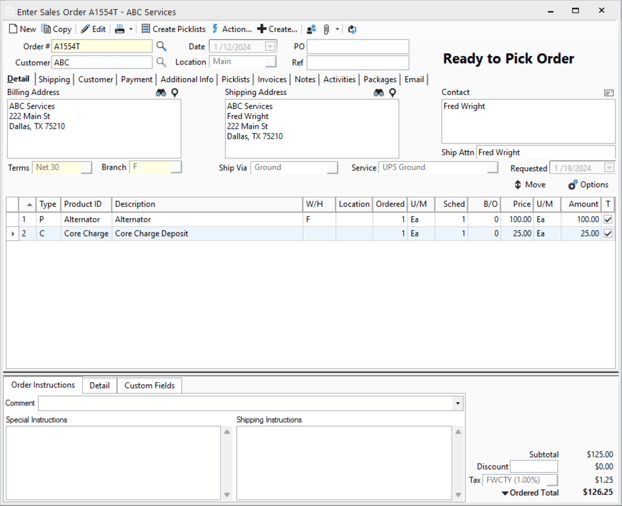
- When you sell say an alternator, you list the alternator, followed by the core charge product.
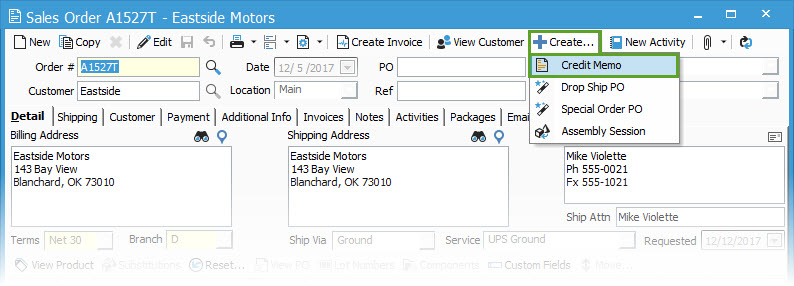
- When the customer returns the Core, from the completed order Issue a Credit Memo, by clicking the Create button and choose Credit Memo. enter the amount and refund that amount. This clears the core charge liability account for that amount.
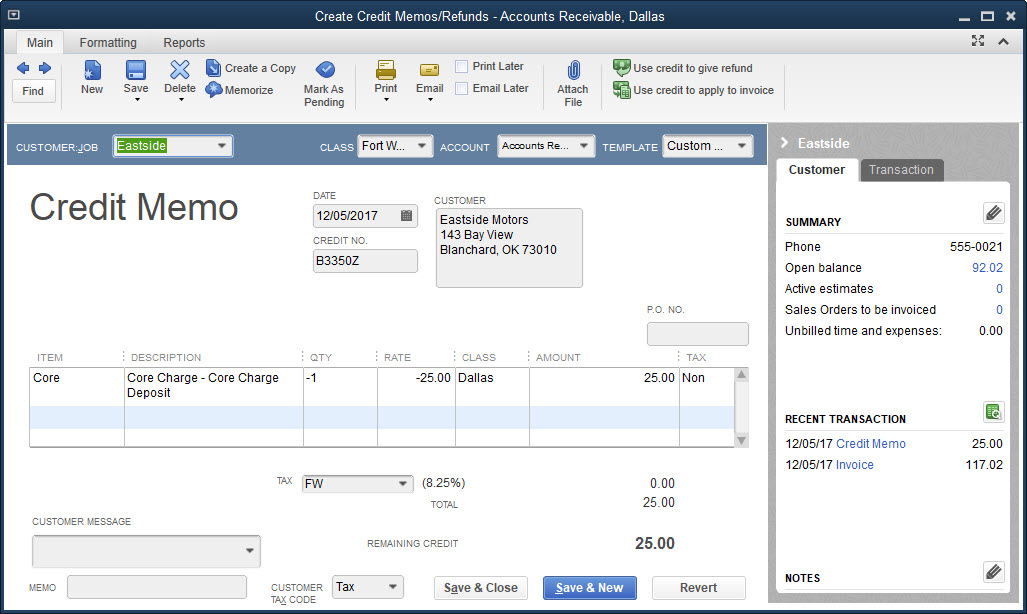
- A new Credit Memo will open for the customer with all lines from the original order. Highlight each row by clicking in the blank section to the left of the Line Number and then right click to delete the row for anything not included in the credit.
- Save and Create Credit to issue the credit back to the customer for the return of the core.
- The next time you sync with QuickBooks you should now see the Credit Memo for the Core Charge applied to the customer record in QuickBooks.
In this article, we used "Cores" as an example, but following the steps from this article, you can use any refundable product you need.