Locating the Acctivate database path
Starting in 12.2, the installer will now ask for the Acctivate SQL server path when installing a workstation. This article will help you locate that.
When installing the Acctivate workstation, you'll be asked for the "Acctivate Server" during the installation. For most customers, this box will automatically populate the server as the installer will scan your network to locate SQL instances, and will default to any instance called "Acctivate"
If your Acctivate data is hosted on the cloud, you'll need to manually type in the SQL server path. If Alterity hosts your data, this will be provided. If your data is hosted elsewhere, you'll need to ask your hosting provider for this.
You will also be prompted to enter a SQL username and password. Again, if Alterity hosts your data, this will be provided. If your data is hosted elsewhere, you'll need to ask the hosting provider.
For some users, the drop down may return multiple instances, and you'll need to know which one to use. You can find this using Database Maintenance on another workstation currently connected to Acctivate, or on the server. You can do so with the following steps:
- Open the Acctivate database Maintenance program.
- Go to "Database" on the top bar, and select "Database Info."
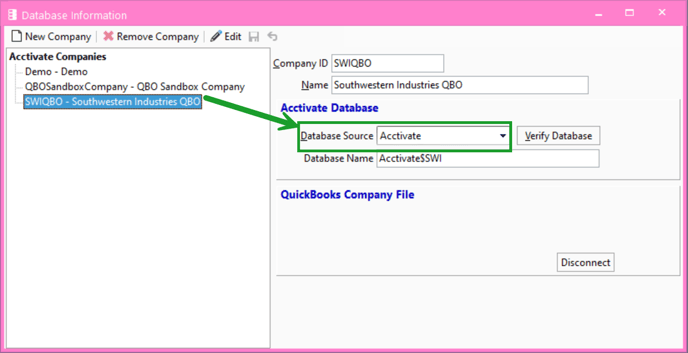
- Select your company from the list and take note of the "Database Source"
- Go to "Database" again and select "Database Sources"
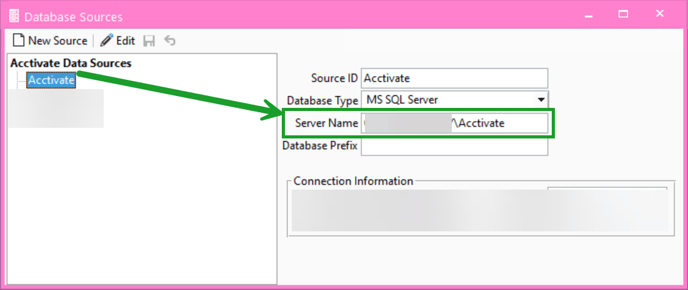
- Select the Acctivate Data Source that corresponds to the DataSource found in step 3.
The "Server Name" will be the SQL path you're needing to note down, as that's what the installer will ask for.

