Embedding the Acctivate SQL database password in an Microsoft Query.
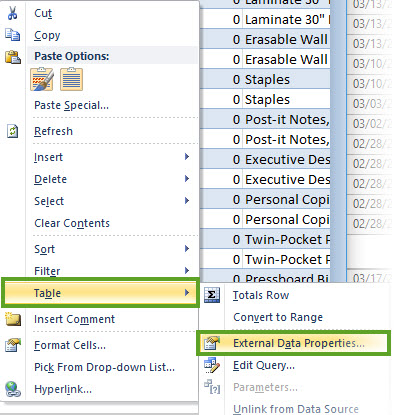
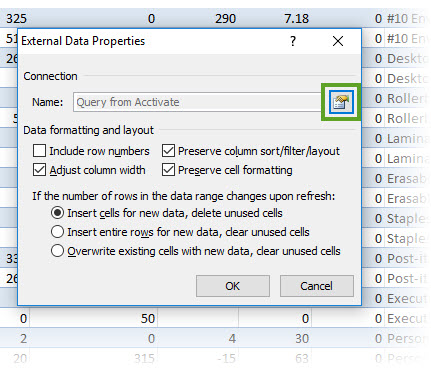
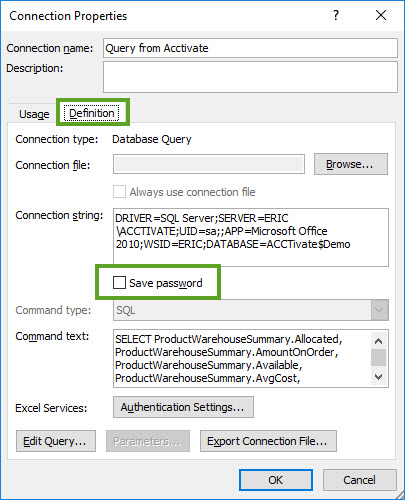
To save the SQL Server password for a Microsoft Query database connection, right click anywhere in the Excel table and select Table > External Data Properties. Click the Connection Properties icon, Definition and check Save Password.
If you have created a Microsoft Query using an ODBC connection to the the Acctivate database and now you need to refresh the data but Excel is asking for a password. This is because the Allow saving Password in your Microsoft Query was not checked on the Connection tab of the DataLink Properties window. This is fairly easy to resolve. Follow these simple steps to embed the database password in the Query to prevent it from prompting for the password each time. This allows you to put the file in a shared location for group access and is more convenient for users to refresh and and re-run the query.
(*Note: steps may vary slightly depending on your version of Office)
If this is your first time creating a Microsoft Query:
- If this has not already been done, first you must Create an ODBC Database Connection to your Acctivate Database
- Next, follow the steps here to Use Microsoft Query to Display Data from Multiple Tables
- After the Query has been setup to save the password embedded in the file right click anywhere in the Excel table
- Select ‘Table > External Data Properties’

5. Click the Connection Properties icon

6. Click Definition and check the box for Save Password

For additional information refer to this Microsoft Support article for step by step instructions