Your EDI VAN or Trading Partner may request a modification to the EDI filename structure when you are in the process of setting up a new EDI Trading Partner. Modifying the filename structure can be accomplished by modifying the Trading Partner Mailbox File Mask, which is located in Configuration Manager.
- In Acctivate, go up to File -> Configuration Management
- Double-click EDI in the tree to the left to open the EDI configuration.
- You may set the filename at the system, partner, or document level. If setting at the system level the mailbox file mask should be blank on the partner level.
- Select the trading partner or <System> from the Trading Partners list on the left hand side.
- If setting on <System> or Partner level select Partner Options > Show Advanced🔽 > Outgoing Files.
- If setting on the document level, select the document
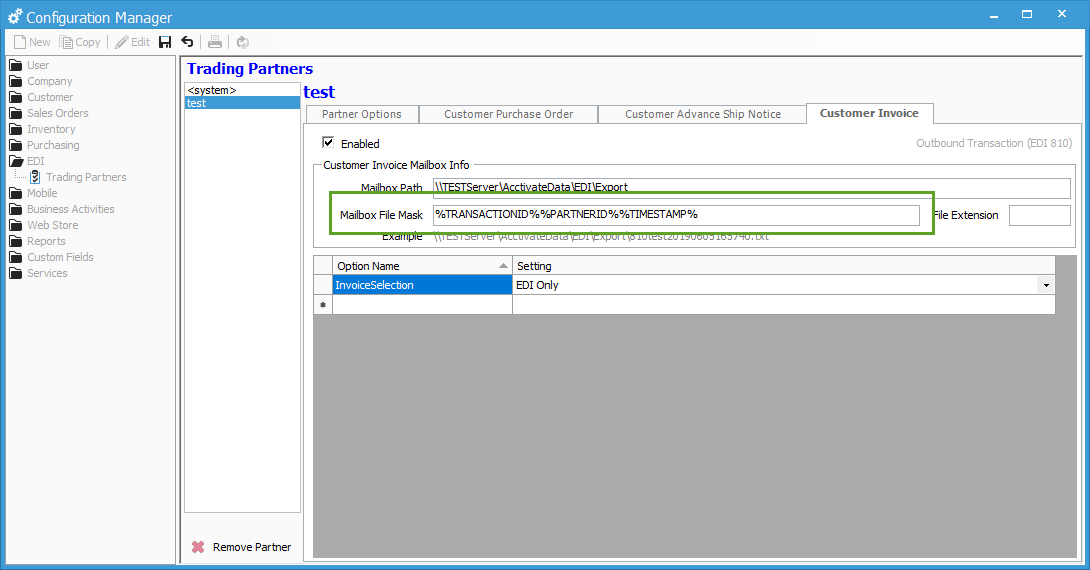
- Update the Mailbox File Mask. In the example, below, I am modifying the filename structure for the Customer Invoice (EDI 810 ) for the 'TEST' trading partner.
You can double-click in the Mailbox File Mask field, which will give you a list of default options, which are:
- %PartnerID%
- %TransactionID%
- %BranchID%
- %FileStamp%
- %TimeStamp%
You may add multiple fields using the formatting above for each field and separating with an underscore ( _ )
For more information about trading partner options, check out our docs page.