Acctivate cannot default to a redirected printer because every time a user logs in to RightNetworks, the printer gets a new #number, changing the name of the printer. However, once the printer settings are set up, select the printer and stock to print. The directions below explain how to configure Acctivate, the label report, and TSPrint to allow Acctivate to correctly print the labels.
To Print with TSPrint, follow the directions in each section:- Configure TSPrint on the desktop
- Configure the Report Printer Assignment
- Configure the Report Page Setup in Crystal Reports
- Print labels using TSPrint
- What to do if moving to a new computer
Configure TSPrint on the desktop
Make sure Dynamic Redirection is turned on for that printer in the TSPrint options. Set these options on the desktop, not the hosted server.
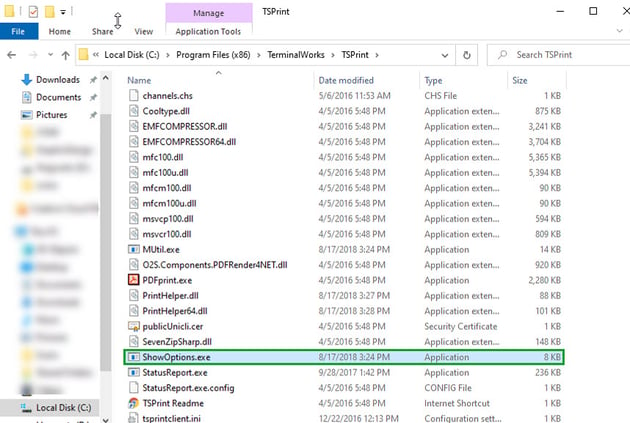
- On your desktop, not the RightNetworks virtual server desktop, go to File Explorer.
- Go to the Terminal Works folder located in C:/Program Files (x86)/ Terminal Works or C:/Program Files (x86)/ TerminalWorks/TSPrint
- Select the app called "Show Options" or "ShowOptions.exe".
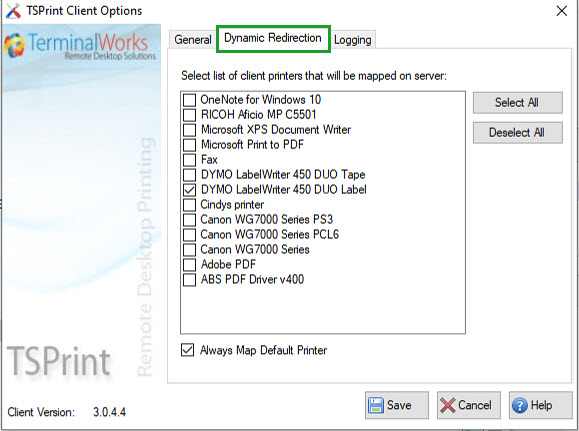
- Click the Dynamic Redirection tab and check the label printer that should print the labels.
- Save and close TSPrint Client Options when finished.
- Setup the label stock size.
- Open Printer settings in Windows.
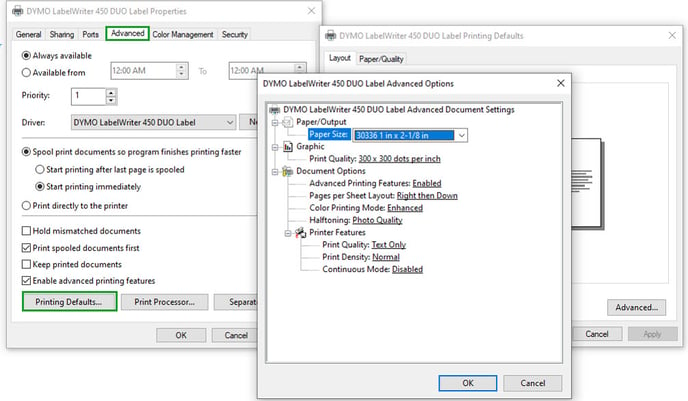
- For the printer, select Printer Properties.
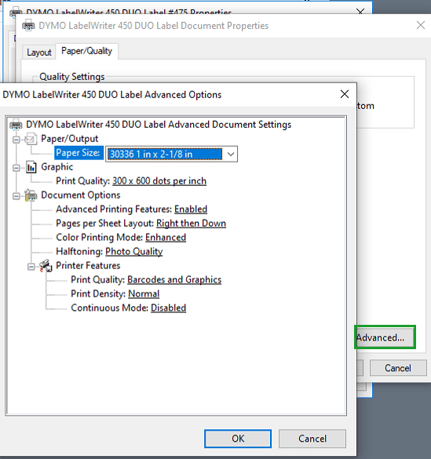
- Select Preferences and click the Advanced option on the Layout window.
- Change the stock to the desired label stock size. Push OK
- On the Paper/Quality tab, make sure the stock is the same sock you selected. Push Apply when done.

- Select the Advanced tab on the Printer Properties window.
- Click Printing Defaults...
- Select the same label size you selected as before and push OK.
- Go to the Paper/Quality tab on the Printing Defaults to verify the right stock is selected. Apply changes when done.
- Select Apply on the Label Properties window to close out.
Configure the Report Printer Assignment
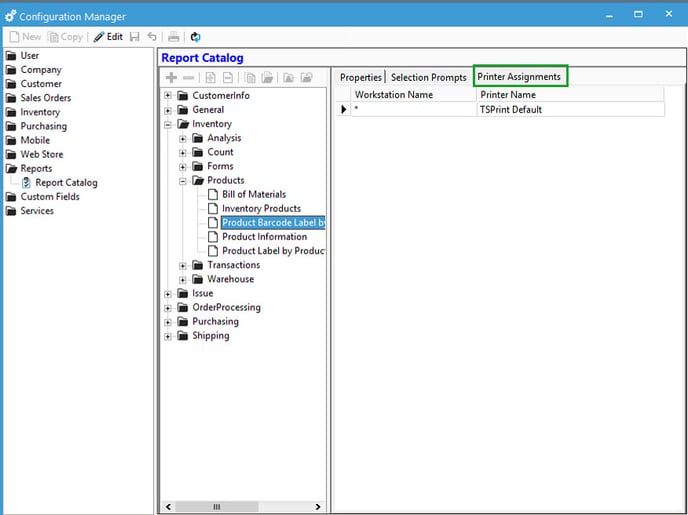
- Open Manage Reports from the file menu
- Expand the folder and select the report you want to print.
- Click on the Printer Assignment tab and add "*" to the Workstation Name. * will allow everyone to print on the network. Set the Printer Name to the TSPrinter, usually named TSPrint, TSPrint Default, or something similar.
- Save changes and close out of Configuration Manager.
Configure the Report Page Setup in Crystal Reports
If you do not have Crystal Reports, skip this step and continue with the rest of the article.
- Open the report in Crystal Reports.
- Go to File > Page Setup.
- Select the label printer. Make sure "No Printer (optimize for screen display)" is unchecked
- Select the page/stock size to match what was set up on the default Printer Settings. Make sure "Dissociate Formatting Page Size and Printer Paper Size" is unchecked.
- Select OK and Save when done.
- Add the report to your custom reports folder, usually located in I:\ACCTivate\CustomReports for RightNetworks.
How to Print labels using TSPrint (Directions on printing labels after it's configured)
NOTE: Either option can be done either from the Report Selection Criteria window or the Print Preview window. Use the Print button to access the Send to Printer window on either window. If using the option to print from Selection Criteria, skip the step on selecting Preview and go to the next step.
Printing if the TSPrint Default printer is not the label printer
- Open the label you wish to print in the Print Preview window in Acctivate.
- Select Preview.
- Select Print.
- Using the dropdown menu, change the Printer. Select your printer, for example, “DYMO LabelWriter 450 DUO Label #numerals".
- Click Printer Properties. Under the Options tab, change the Stock to your label stock setup on the report. Click OK.

Printing if the TSPrint Default printer is the label printer (Not Recommended)
print > ok > Label Printing Preferences > Advanced > select stock > apply & OK
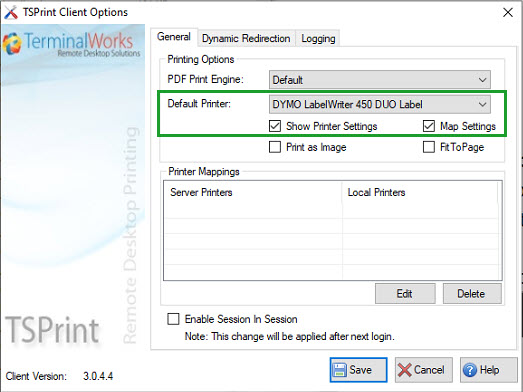
- Open TSPrint Client Options (Step 1 is a one-time setup)
- Set the Default Printer to be the same as your label printer.
- Check Show Printer Settings and Map Settings. This allows the printer settings window to open without selecting Properties on the print window in Acctivate.
- Save and close TSPrint Client Options.
- Open the label you wish to print in the Print Preview window in Acctivate.
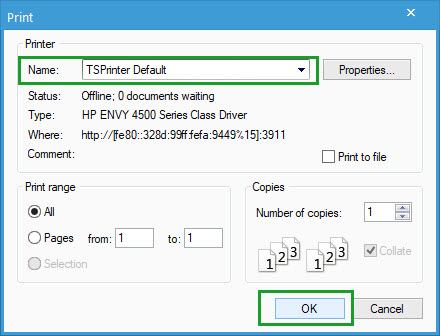
- Push Preview.
- Select Print. The printer should be TSPrinter Default.
- Using the dropdown menu, change the Printer. Select your printer, for example, “DYMO LabelWriter 450 DUO Label #numerals".
- Click Printer Properties then Advanced. Under the Options tab, change the Stock to your label stock setup on the report. Click OK.
- On the Properties window, click OK to print.
If you find that the label is still not printing properly, it may need to be adjusted. If you do not have Crystal Reports, reach out to the support team for assistance.
Moving the printer to a new computer
You will need to setup the Printer stocks. Start after the first screenshot for printer settings. The printer stock should have the same name and size as previously set up. Then make sure Dynamic Redirection is turned on for that printer in the TSPrint options. Dynamic Redirection options are found in C:/Program Files (x86)/ Terminal Works or C:/Program Files (x86)/ TerminalWorks/TSPrint, and the app is called "Show Options" or "ShowOptions.exe" if file extensions are turned on.