Occasionally users may be prompted for a password when trying to view a custom report in Acctivate. This is most commonly caused by using the wrong database connection on the report. If you are receiving the Database Login pop up, first confirm that your report is a custom report, check to see if you are using the OLE DB (ADO) reconnect in Crystal Reports, then recreate your database connection in Crystal Reports. See the steps below to create the database connection. Please contact Support if you need further assistance.
- Open your report in Crystal Reports.
- Select the Database dropdown menu at the top. Then select Set Datasource Locations.
- On the Replace with portion of the window, expand the Create New Connection section.
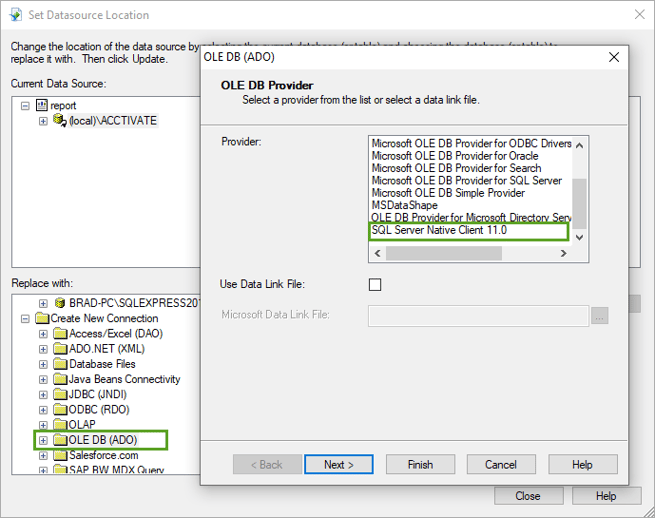
- Scroll down to the OLE DB (ADO) section and click on the '+' plus button to open the OLE DB (ADO) provider window.
- Select the SQL Server Native Client option then click Next.
- Use the dropdown arrow to select the database used for Acctivate or type in your database connection. The Server will be ServerName\SQLInstance. Add the SQL User ID and Password. The default will use the sa user and password. Please contact Support if you need access to the password. After entering the password, use the Database dropdown to select the Acctivate Database Acctivate$Company
- Select Next then Finish to exit the OLE DB connection window.
- A new database connection will be created for Acctivate$Company. Expand the '+' plus sign on the database connection. Expand the '+' plus sign on the 'dbo' section. Expand the '+' plus sign on the Views section.
- On the Current Data Source, expand the current data source by clicking the '+' plus sign.
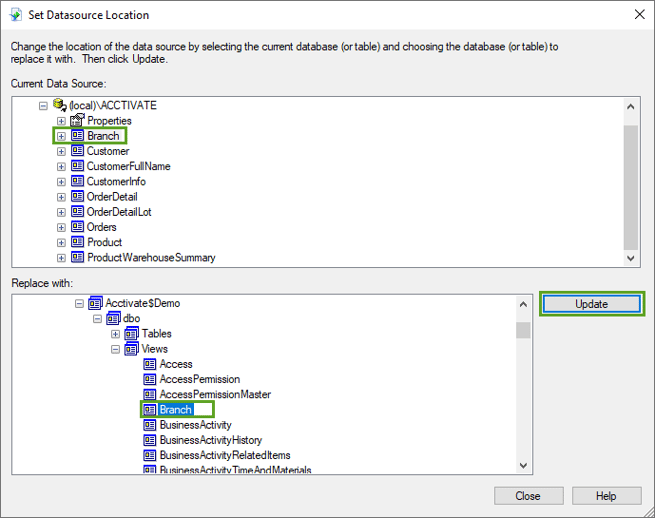
- Click the first View on the Current Data Source to highlight it then click the same View in the Replace with data source section. Select the Update button to replace the old data connection View with the new data connection View. Repeat with all Views connected.
Note: Properties listed first in the list under Current Data Source section is not a View. Do not update this. It will update after all the Views are updated. - Close the Set Datasource Location window when finished.
- Save your report in Crystal Reports to \\ServerName\AcctivateData\CustomReports to replace the original report. Your report is now ready to use in Acctivate. You should no longer be prompted to enter a password to access the report.