Receiving inventory into a location.
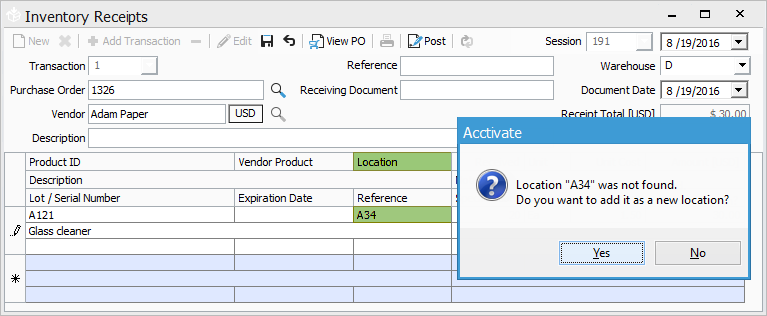
On the receipt window, choose a location from the drop-down. If the location needed doesn't yet exist for that product, you can enter the location name instead and choose Yes when prompted to add it.
You will receive inventory as usual, but if you need to receive inventory into a different location other than the primary location for the product you will have to change it in the Location field.
The Location field is in the data grid of the Receipts window (Inventory > Receipts) for each product entered. When a product is entered, the Location field will default to the Primary location of the specific product in the selected warehouse.
To receive inventory into a location other than the Primary Location choose from one of the 3 options below:
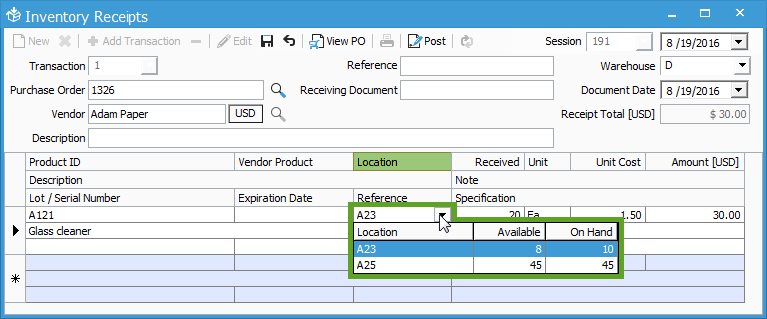
- To select a location already listed on the item, click in the Location field and click the drop-down arrow that appears. When quantity exists in multiple locations, you’ll see the list in the drop-down menu.

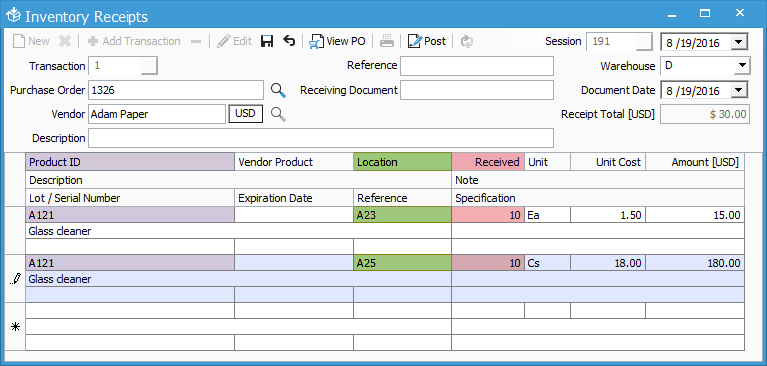
- If you want to receive inventory into multiple locations for the same product, you must add the product again on a new line. Each line will have its own Location selected. Make sure to edit the received quantity to reflect what’s going into each location.

- To add a new location to receive inventory, type the new location in the Location field. If the product does not exist in this new location, a prompt will pop-up asking to add the location. Click Yes, if you wish to add it.
