Why is My Database "Read-Only" After Moving to a New Driver Location?
Occasionally, after moving your SQL Database to a new Drive, SQL updates the permissions to be Read Only for the database. You can update this in SSMS (Microsoft SQL Server Management Studios) on the server.
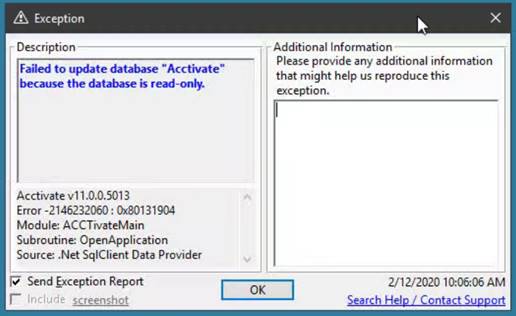
After moving your SQL Server, the Properties may update to be Read Only. This can result in the Exception similar to "Failed to update database "Acctivate" because the database is read-only". You can update the SQL Database permissions in Microsoft SQL Server Management Studios (SSMS).

Update Permissions to allow Read-Write access on the database

- On the server, open SSMS. If you do not have it installed, read our article on SSMS or visit the Microsoft website.
- Log in using the sa user and password for SQL. If you are not using the default login, please contact your System Admin for your SQL login credentials. Please contact support if you need the 'sa' password.
- Once logged in, expand the Database folder on the left Object Explorer pannel.
- Right-click on the database you need to allow Read-Write access. Click Properties at the bottom of the list.
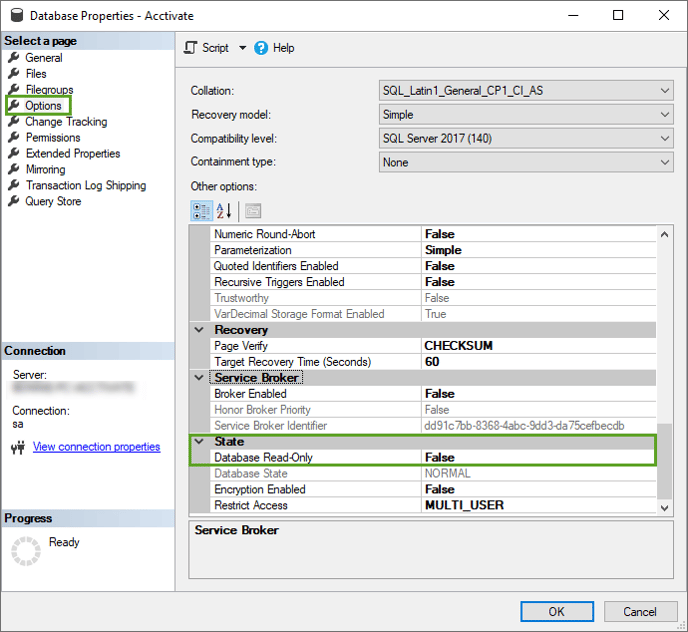
- In the Database Properties - DatabaseName window, click on Options in the Select a page pane on the left.
- Scroll down to the State properties section. Check the property "Database Read-Only". This should be set to False. If this is set to True, the database is in Ready Only mode. Click the box on the right of Database Read-Only (the box will say True), and use the drop-down arrow to select False.
- Push OK and close out of SQL Server Management Studios.
- Now you should be able to use Acctivate to read and write to your SQL database.