Setting up 3PL warehousing with EDI.
If you plan on sending warehouse orders and importing in warehouse shipments to those orders, then you will need to follow these steps to setup 3PL transactions with EDI.
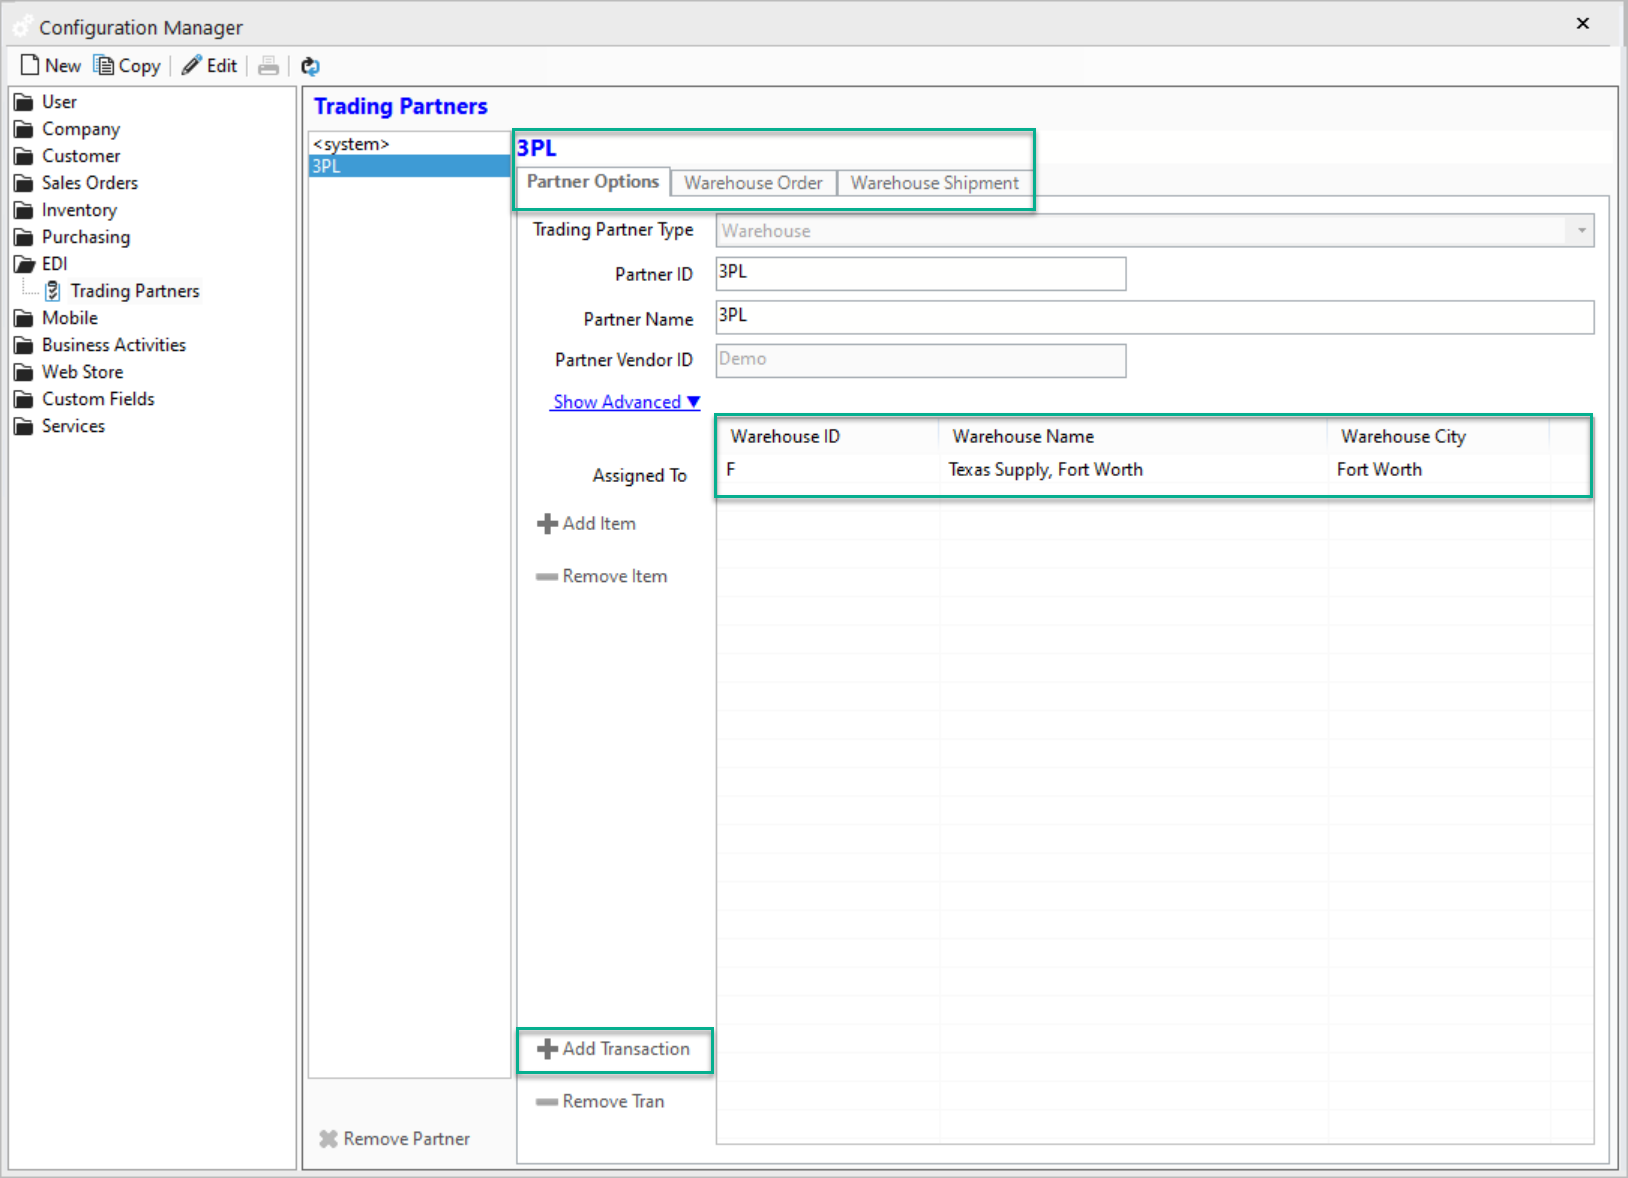
1. Go to file > Configuration manager in the top left window of Acctivate.
2. Click on EDI
3. Click on Trading partners
4. Click on NEW > Enter in the 3PL name > click on ADD ITEM and add the warehouse in which the orders will come out of.
5. At the bottom click on ADD Transaction and click on “warehouse Order” and “Warehouse Shipment” and Save.

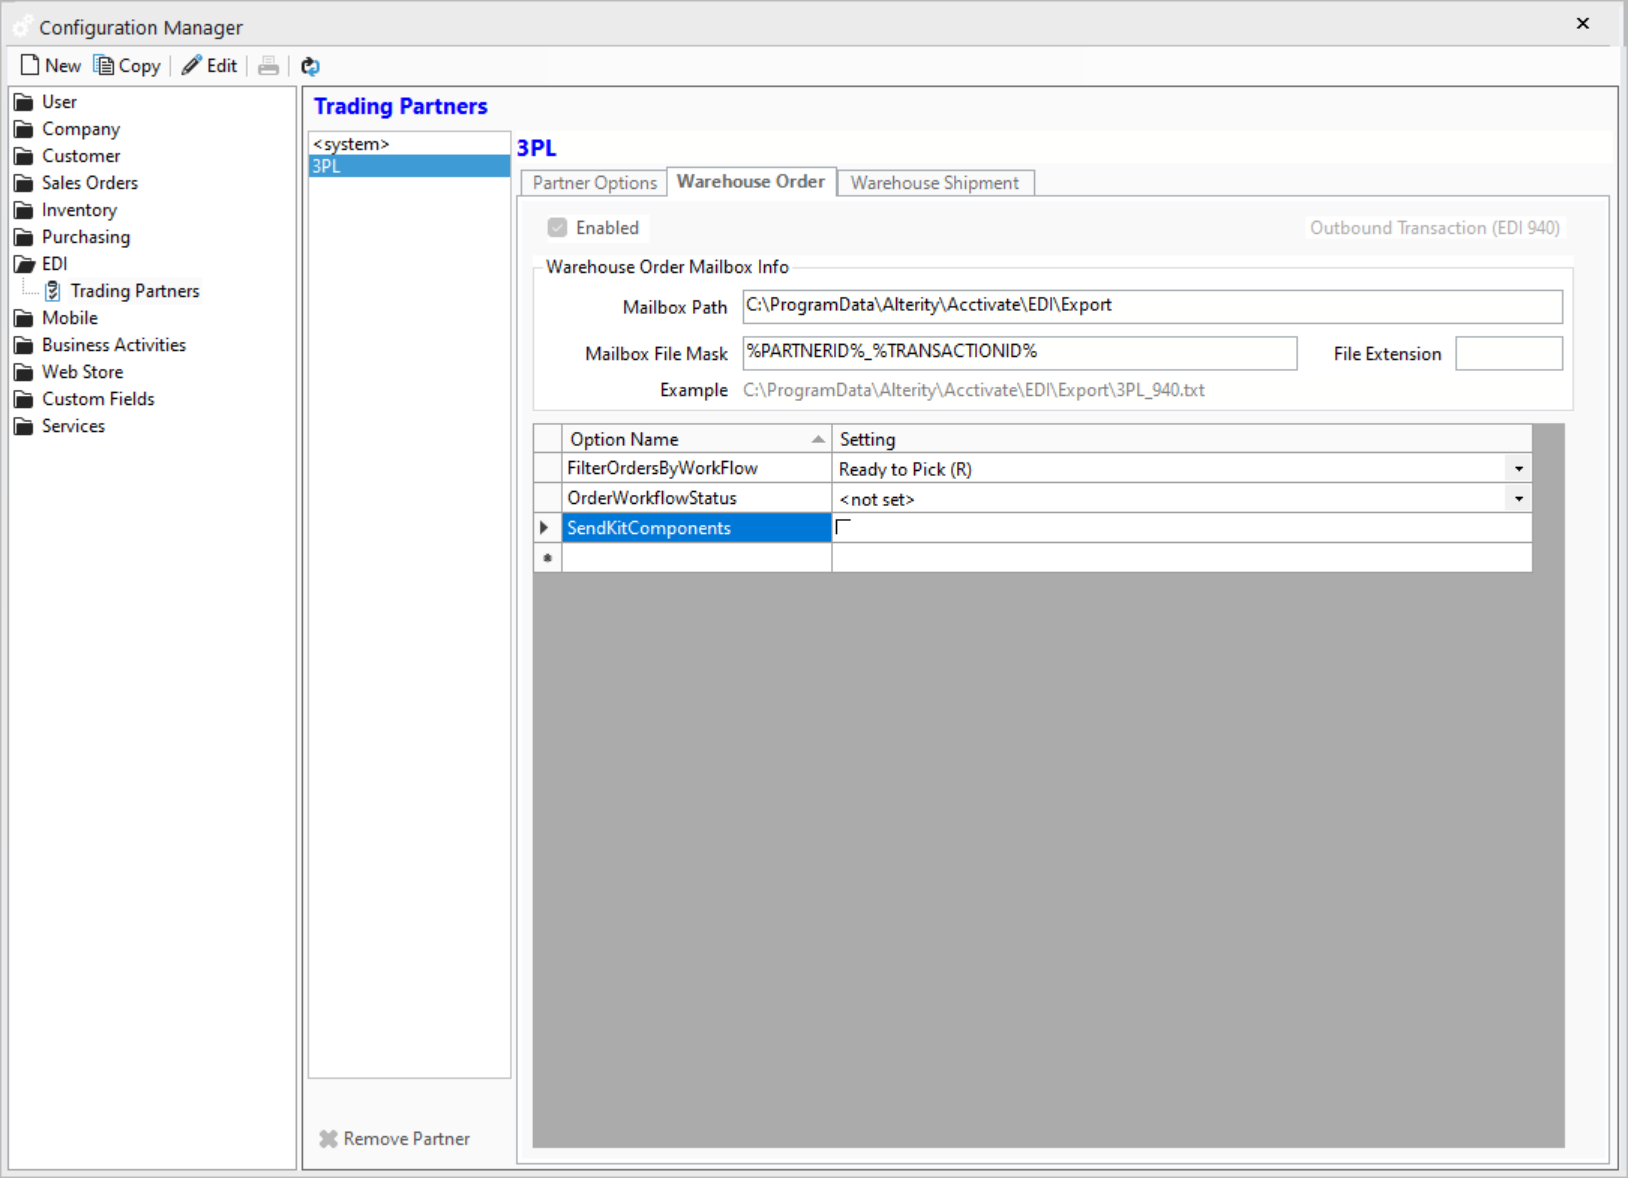
6. Click on the Warehouse Order tab (EDI 940 document) and click ENABLE, then enter in the path in which the orders will be exported to. You can also set what workflow statuses will correlate to what will be exported. For more information click here.
7. Once the path is verified and all the settings are correct, click SAVE.

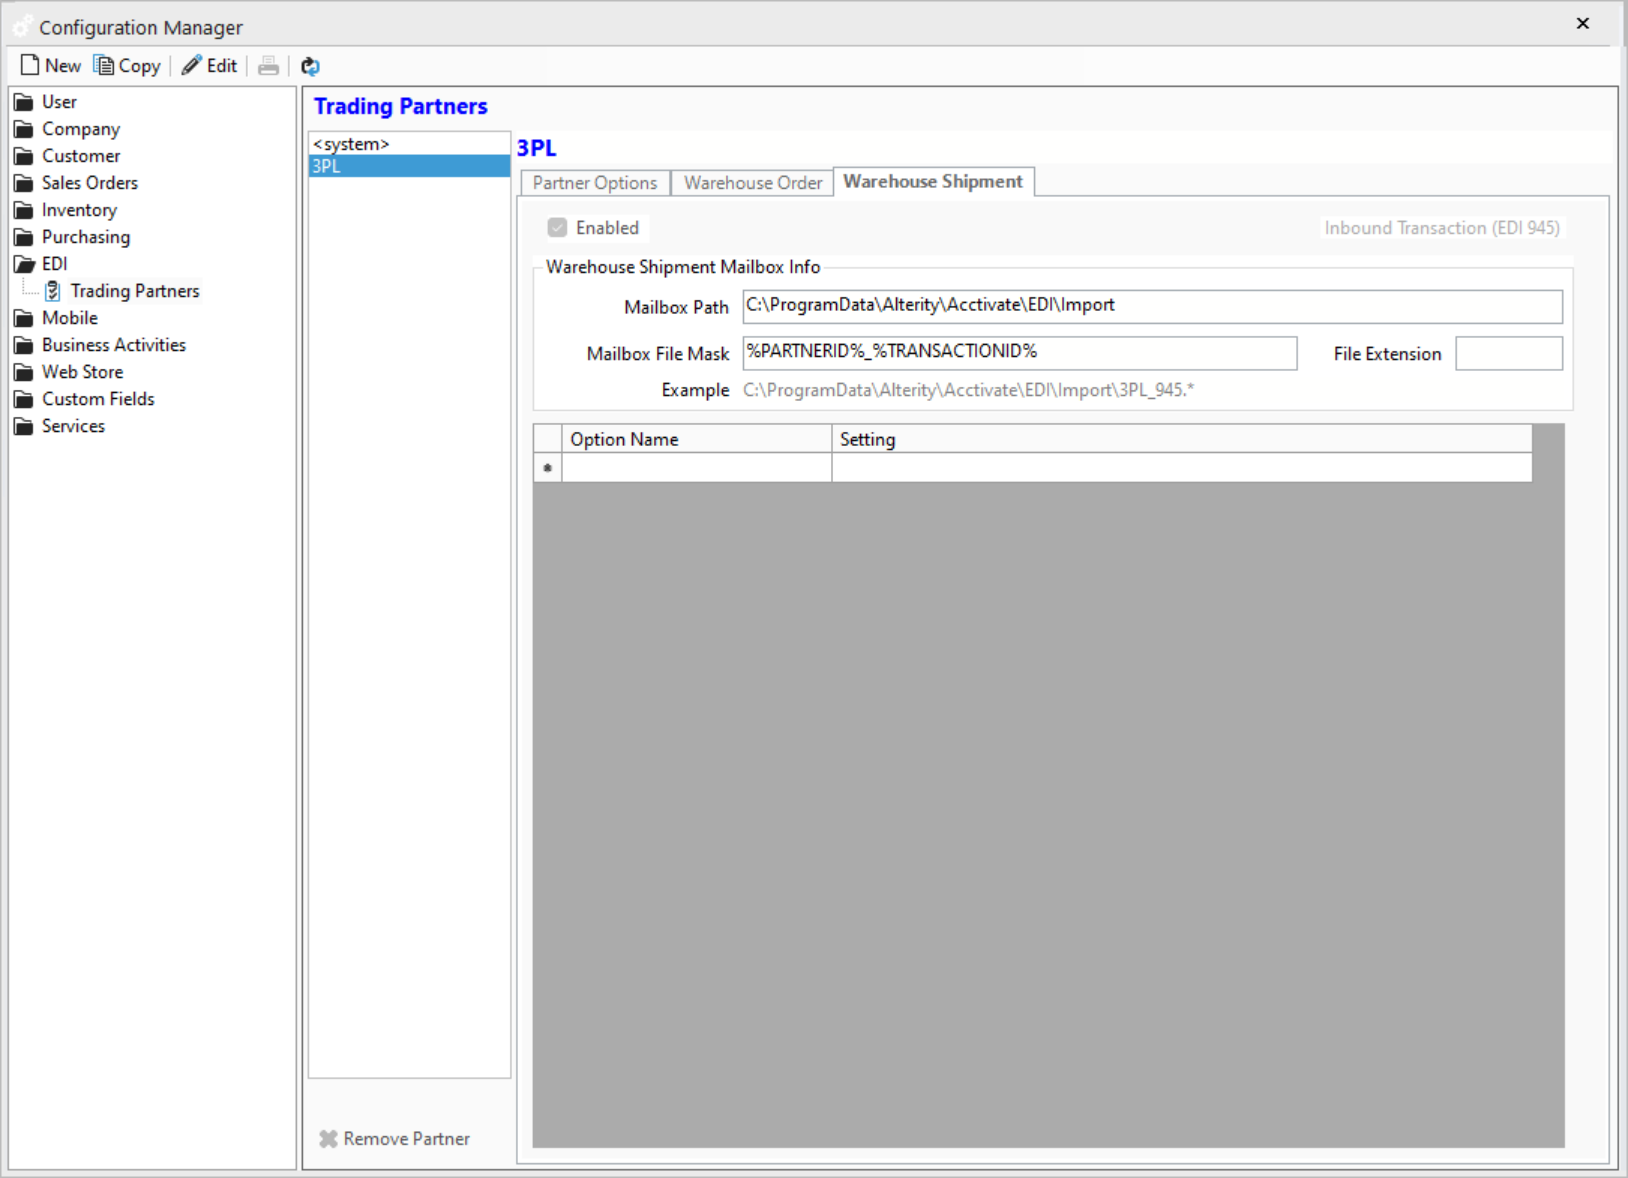
8. Click on the Warehouse Shipment tab (EDI 945) and click Enable, then enter in the path that will be used to import files from the VAN.

9. Once you click SAVE your EDI 3PL setup is complete. If there are any Warehouse orders that correlate with that warehouse and the workflow status, those orders will be exported on the first EDI sync. Also, if you have any warehouse shipments that came in (EDI 945) to the path specified above, those will be imported into Acctivate.
For more information about setting up 3PL warehousing, check out our docs page.