Syncing with QuickBooks Desktop after moving a QuickBooks company file.
If you've recently moved your QuickBooks company file to a new location, take these steps.
Acctivate saves the path to the QuickBooks company file (.QBW) in Acctivate Database Maintenance. If the .QBW file is moved to a different directory, you will need to update the configuration of Acctivate in order to be able to connect to QuickBooks in order to perform the synchronization.
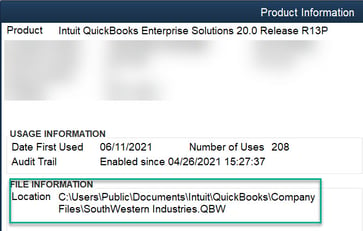
- Open QuickBooks. Press F2. This will open the QuickBooks Product Information window.
- Locate the "File Information" section, located in the middle left side of the window.
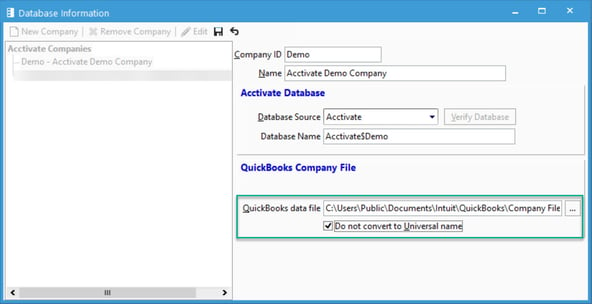
- Open Database Maintenance by going to Start > Programs > Acctivate > Acctivate Database Maintenance.
- Go up to Database > Database Info.
- Select the Acctivate Company you are wanting to modify
- Hit the Edit button.
- Paste the file location into the QuickBooks data file field by pressing Ctrl + V. You may have to toggle the option below if the file is not in UNC form (\\server\folder\file.QBW).
- Hit Save.
- You may need to log out of Acctivate and close Database Maintenance in order for changes to fully take effect.
- Log back into Acctivate and select to open QuickBooks. This should open QuickBooks properly.

