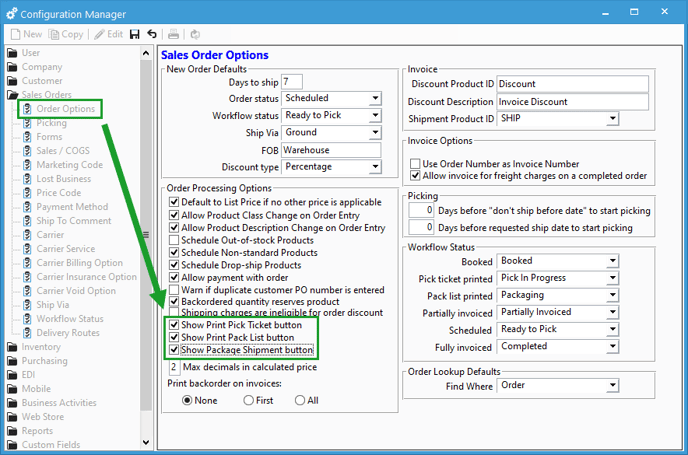
Configuring the Next Action button on the Sales Order window.
Go to File > Configuration Management > Sales Orders > Order Options and, in Edit mode, toggle the "Show {NextAction} button" for the corresponding action.
The sales order window within Acctivate has a "Next Action" button that will switch to different steps in the sales order process depending on the state that the order is currently. See this article to learn more about the "Action..." and "Next Action" buttons.
.png?width=688&name=PackList(cropped).png)
While this button can be useful and help easily move the order forward from one state to another, not all orders or companies will need to do things like print a packing list. For instance, it may be preferable if the button jumped straight to Create Invoice. Some of the sales order actions that appear for the "Next Action" button can actually be turned off to do just that.
To stop an action from appearing on the Next Action button, go to File > Configuration Management then double click Orders and select Order Options.
 The options available will cause the Sales Order window to show the corresponding action if checked. Currently, you can toggle on and off the Print Pick Ticket, Print Pack List, and Package Shipments actions. Even if the options are turned off, these options can still be chosen with the Action menu since only the Next Action button will be affected.