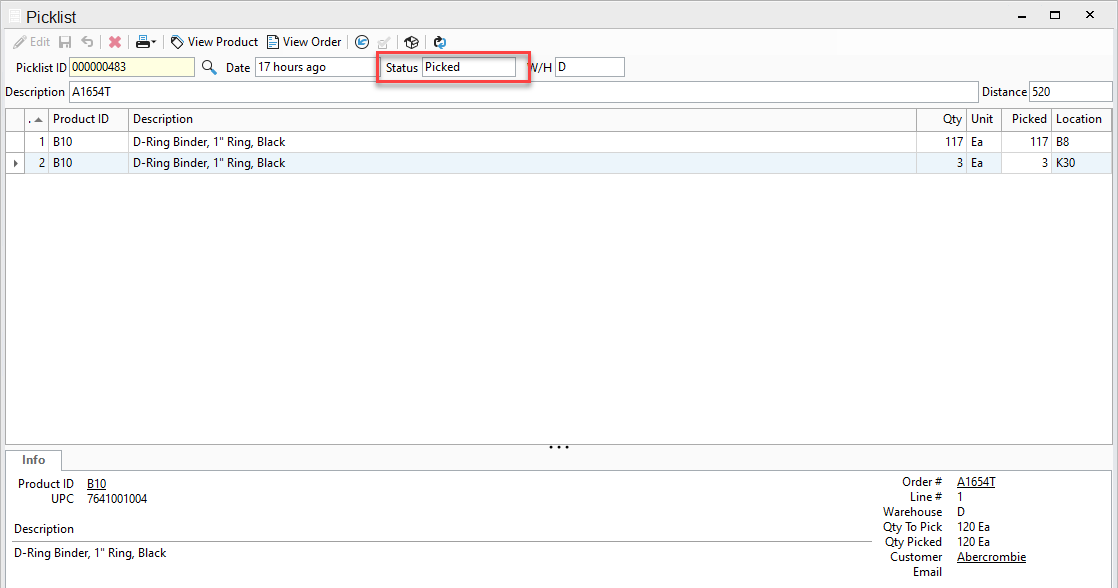
Using Picklists from the Picklist Window.
1. Select Picklists from the menu buttons at the top of your screen.

2. Select the picklist you need to complete.
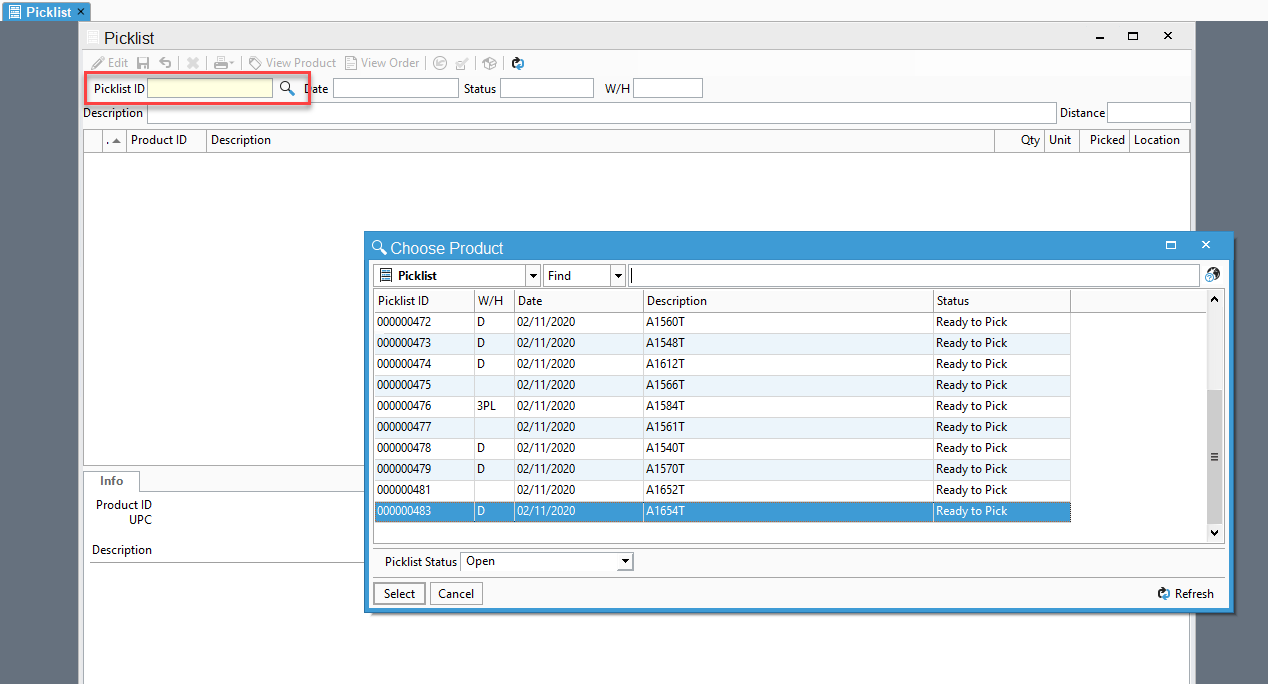
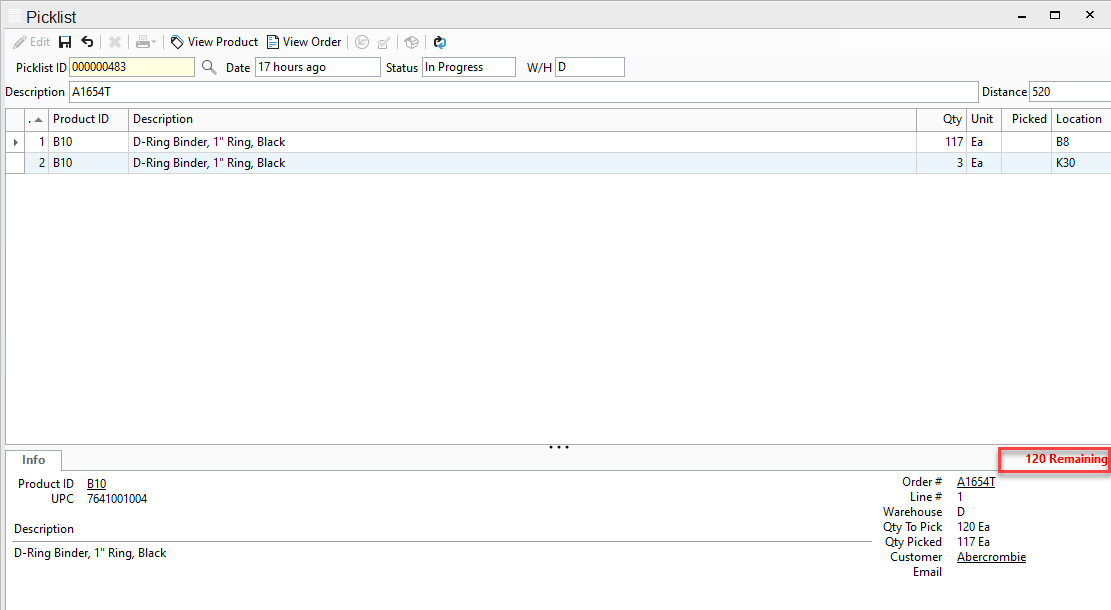
3. Once you have chosen your Picklist, your picklist should currently be in Ready to Pick status and there should be red words stating how many items are left to pick in your picklist. Click Edit so you may enter in the picked amounts for each product.
4. Once you have entered your picked amounts, Click Save. You should now see that your order is Picked in Full and the status now shows In Progress.
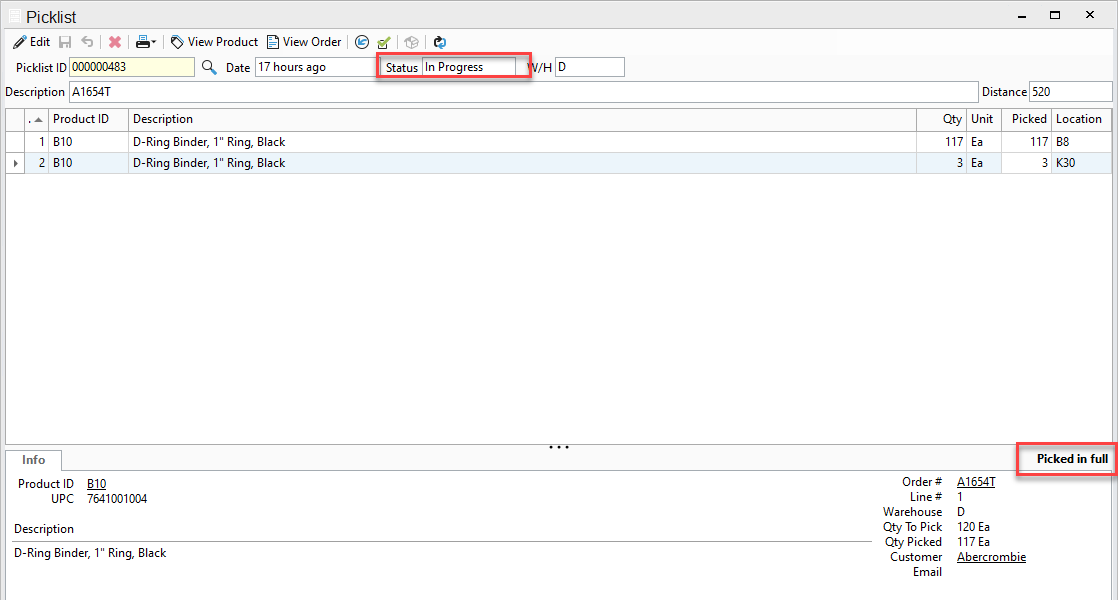
5. Now you can Close the Picklist by clicking on the Green Check Mark at the top of your screen. You will be asked to confirm that you want to complete the picklist.
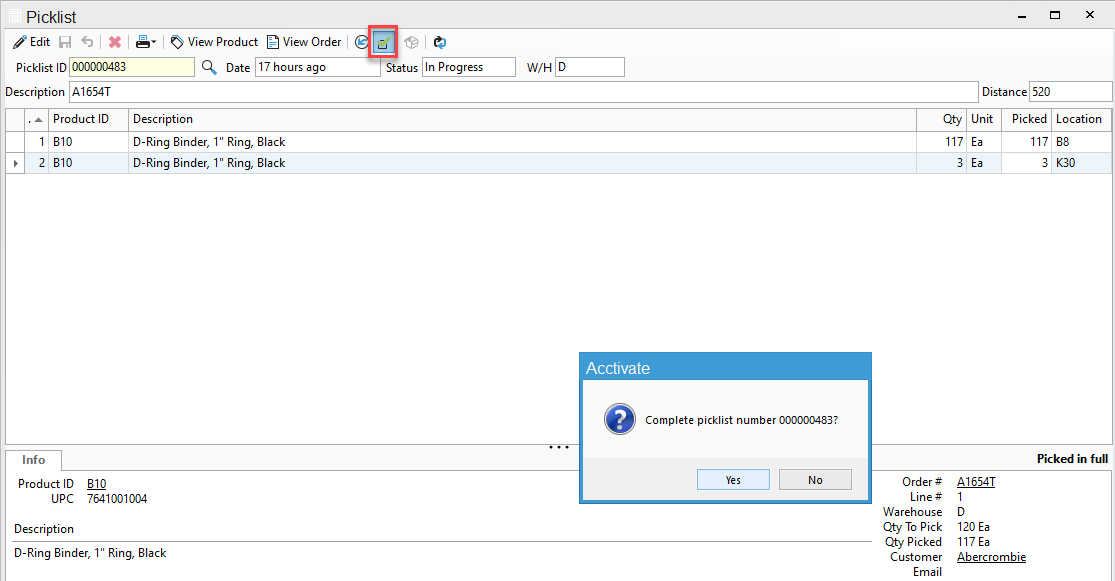
6. Once you have clicked Yes you should now see the picklist status change to Picked.
