Acctivate's Multiple Location module can be used to track warehouse locations for your products. A product can be stocked in multiple different locations in your warehouse and picking documentation will display these locations to pick from.
Before enabling locations, there are a few things to think about:
- Location tracking requires setting locations on transactions such as sales orders and receipts. Failure to set locations will result in "blank" locations with negative quantity.
- You can prevent this with a configuration option located under Inventory > Inventory Options > Require locations on all transactions. This will force a location to be set to be able to invoice an order or post an inventory transaction. It is HIGHLY recommended you enable this immediately after enabling locations.
- Any products that do not currently have a location assigned on the product window when multiple locations are enabled will be put into a blank location and will need to be transferred to an official location. It's a good idea to build an excel spreadsheet to import in a transfer from blank locations to actual locations.
- All products with locations assigned will have their location field set as the "primary" location when multiple locations are enabled. This is the location that the product will default to on transactions.
Creating and Managing Warehouse Locations
In Configuration Manager, users can create new warehouse locations or manage the list of existing locations. To access these options:
- Go to File > Configuration Management.
- Select Inventory > Locations.
- In Edit mode, click the Enable button to enable location tracking for inventory transactions.
- Once location tracking has been enabled, the Warehouse Locations screen will change to look like this:
- Here, you can convert any locations currently set on product "location" field to be locations under the new multiple location system.
- If you have or will have multiple locations for a product, select the delimiters that you want to be used to separate the locations. (i.e. J44;J44;K13)

- Click Preview and a full list of locations for each warehouse will be displayed. If you have not created locations yet, you can add one to the list by adding the location name and zone to a new row (specified by the *).
- The Location field is where you will enter the name of the location.
- Positions are the vertical stacks on your shelf. This is useful for warehouse layout.
- The Zone field is a way to group related locations, and is used for inventory counts. This field is optional.
- Unless the Active checkbox is checked, the location will not appear outside of Configuration Manager
Click Save to save your changes and add the new locations into Acctivate. You can also add new locations to Acctivate in the inventory receipts window by entering a location name into a product's "location" field.
Viewing location information for each warehouse a product is stocked:
The Available and On-hand quantities for warehouse locations can be viewed on the Inventory tab on product list window.
- Open the Product list window by clicking "Products" on the left side bar.
- Type in a product ID or select a product from the list.
- Click the Inventory tab.
- Locations will be seen in the Locations card for each warehouse.

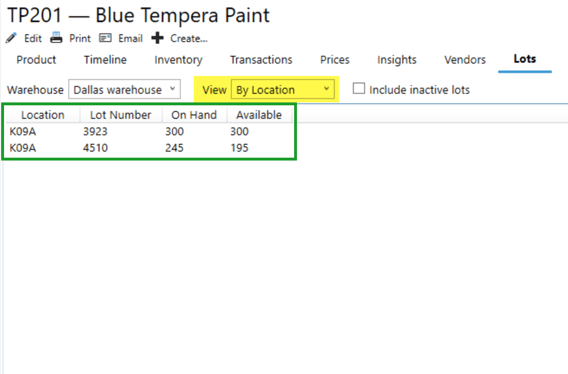
Viewing lot/Serial locations:
Lot numbers can also be assigned multiple locations in a warehouse. You can view each lot and location by clicking the Lots or Serials tab and then changing the View dropdown to be By Location
Performing transactions for specific warehouse locations