From time to time, it may be necessary to void a posted Invoice in Acctivate. Often, it may be the case that the Invoice which needs to be voided has a related Payment record. The process of voiding the Invoice is easy enough (see our Void an Invoice help article). If you need instructions on voiding a standalone payment created in the edit payment window, you can skip the that part of the article by clicking this link.
Voiding an payment with an Invoice:
Payments are separate from invoices in Acctivate. Voiding an invoice does not automatically void the payment. After voiding an invoice, you'll receive the message below:
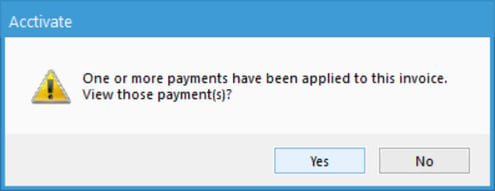
Clicking "Yes" will open the payment in the "Customer Payment" window, and from there you can click on the red X icon to void the payment.
Clicking "No" will keep the payment as a credit on the customer's file.
If the payment has already been synchronized to QuickBooks, you will be unable to void it in Acctivate, and instead you will need to void it in QuickBooks. Voiding it in QuickBooks and then syncing will push over the void into Acctivate.
Voiding a standalone payment not tied to an invoice
Acctivate also allows you to create standalone payments using the new "Customer Payment" window. If you need to void a payment created like this, take these steps:
- Open the customer in question that the payment was made for. You can either do this on the "Customer" presentation screen or in the "Edit Customer" window.
- For the presentation window, locate the payment in question and mouse over the customer payment icon. The icon will turn into a pencil for you to click.
- For the edit customer window, click on the "Invoices" tab. You will need to check the "Include zero balance items" check box to show the payments. From here locate the payment row and double click the "DocumentID" box.
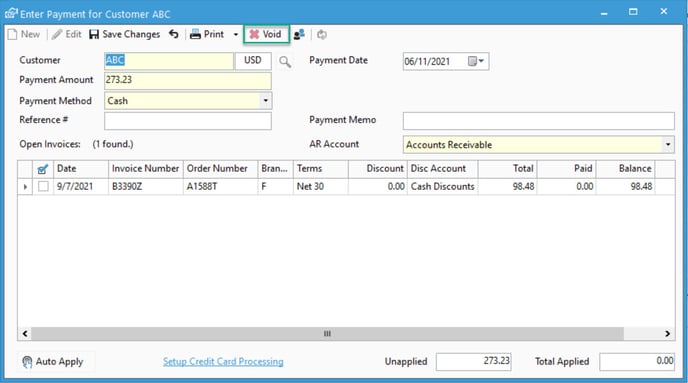
- The "Enter Payment for Customer {NAME}" will appear, where {NAME} will be replaced for the customer.
- Click on the "Void" icon to void the payment.
- Please Note: If the payment was synchronized to QuickBooks already, you will have to void it in QuickBooks. After voiding, your next sync will push over the voided record to Acctivate. You can tell if the payment synced because you will see the following message in the top right corner of the window:
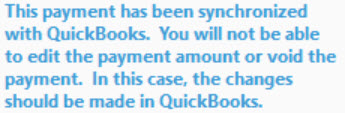
Message: This payment has been synchronized with QuickBooks. You will not be able to edit the payment amount or void the payment. In this case, the changes should be made in QuickBooks.
If you get stuck on any of the above methods and need help, you can contact Acctivate Support here.
For a deeper look at payments and everything about them, check out our docs site!