Creating New Lot/Serial Numbers
Quantity for lot/serial products can only be created from an Inventory Receipt or from an Inventory Assembly.
The only two transactions in Acctivate that allow a user to create new lot numbers for the first time are Inventory Receipts and Inventory Assemblies.
Receipts can be from a PO, Manually Entered, or Imported from a spreadsheet.
While Acctivate has a dedicated lot/serial import, it's advised to use the receipts import instead of the lot/serial import. The lot/serial import does not have the same validations as the receipts import. Using the Lot/Serial Number import instead of the inventory Receipts import may cause issues with lots and serial numbers.
To manually generate an inventory receipt for a Lot/Serial controlled product, follow these steps:
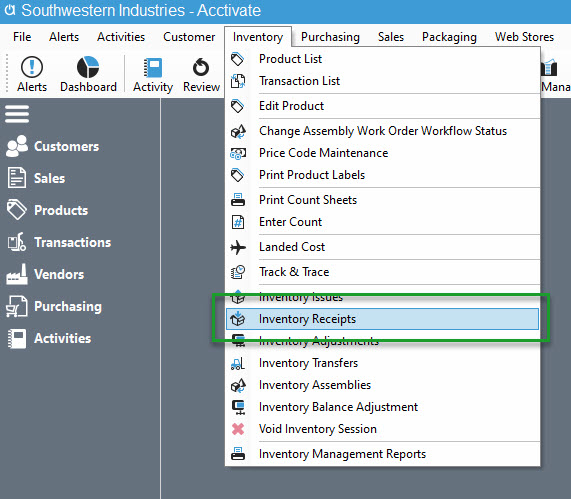
- From the Inventory Menu choose > Inventory Receipts

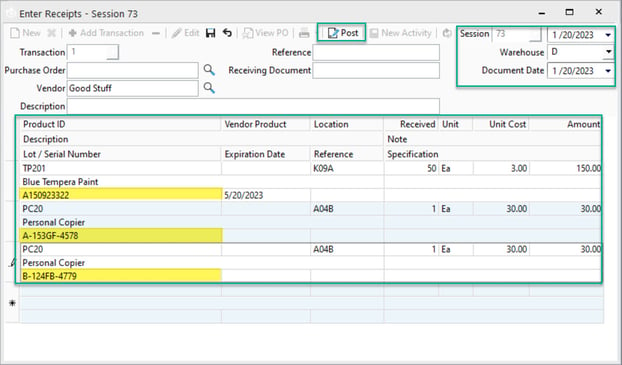
- Be sure the session date and warehouse are correct.
- The session date is going to be the date the inventory will be received into the warehouse.
- Then add the 'required' Product, Received Qty, Cost, and Lot/Serial Number along with any additional optional fields.
- Click Save
- This ONLY saves the transaction, you still have not posted the lot quantities into inventory.
- To add the lot number and quantity to the product you must POST, the receipt transaction. Once the transaction has been posted the receiving of lot numbers is complete.
